
")


")


Earlier this year, Microsoft officially confirmed one of the highly-anticipated Windows 11 features ‘Screen recorder’, but it didn’t end up in the final release of 22H2, unfortunately. However, it looks like Microsoft is planning to bring it to beta and production machines in the coming weeks.
A built-in screen recorder can be useful in a variety of situations, such as sharing a particular clip with friends or recording user activities like troubleshooting, games, or analysis. While there are some great third-party apps and Microsoft’s own Game Bar there to help with this, a built-in Screen recorder could solve plenty of problems for free.
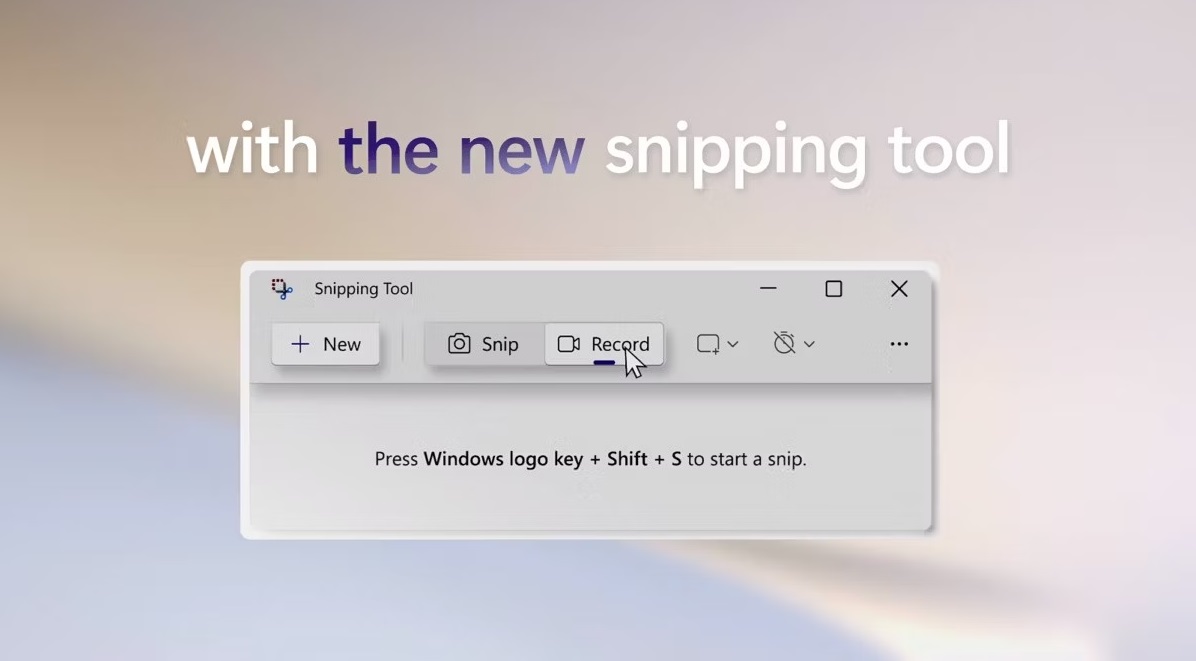
If you have to regularly create screen recordings, Microsoft is working on a built-in Screen recorder for your needs. This new screen recorder can be accessed via the existing Snipping Tool for Windows 11 and it was teased by the company in a new quest posted to the Feedback Hub.
Of course, the third-party solutions will offer more features than Microsoft’s app, but if you just need to capture videos of your desktop more frequently for free, using Windows 11’s Snipping Tool-based Screen recorder may be a good fit.
Microsoft’s Feedback Hub confirms Screen Recorder for Windows 11
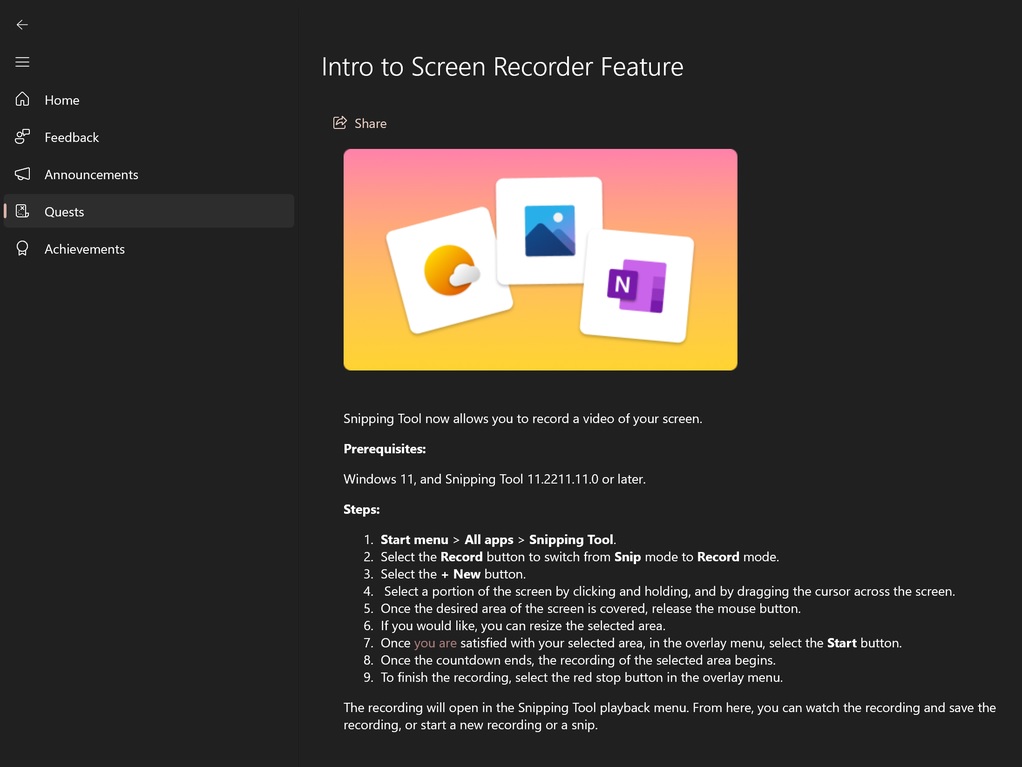
As per a now-removed post on Feedback Hub, Snipping Tool version 11.2211.11.0 or later comes with this functionality.
The screen recorder is apparently coming to all versions of Windows 11, thanks to Snipping Tool integration. Initially, only users in the Dev channel will be able to try the feature.
To use the Screen Recorder feature, Microsoft says users need to follow these steps:
- Open Start menu > All apps > Snipping Tool.
- Select the record button and switch to Record mode from Snip mode.
- Click on the new +New button.
- Select a portion of the screen. To do this, simply click and hold, and drag the cursor across the screen.
- Select the desired area of the screen and release the mouse button.
- Resize the selected area.
- Select the Start button when you are satisfied with your selected area. This would be visible in the overlay menu.
- Once the countdown ends, the recording of the selected region will automatically begin.
- You can stop the record and save the captured footage by clicking on the red stop button in the overlay menu.
Microsoft says the recordings will automatically pop up in the Snipping Tool playback menu.
You can watch the recording and save the recording, or start a new recording or a new snip, according to Microsoft’s Feedback Hub post.
It is worth noting that some users could run into issues with this functionality in the first release of the update. Bugs are expected since the feature hasn’t officially been released and Microsoft needs time to iron out the problems based on feedback from the testers of the Windows Insider program.


")


")
