


")
")

 and it removes old modem drivers")

Windows 11 Build 26120.3653 introduced an easy way to recover your PC when it suffers from boot failure, which is not an uncommon sight. Microsoft calls the feature Quick Machine Recovery (QMR), and it is essentially an automated troubleshooting process with cloud support.
What is Quick Machine Recovery?
On June 26, 2025, Microsoft posted about their Windows Resiliency Initiative, which is their attempt at embedding resilience and security into Windows. QMR is a part of this effort, and the goal is to reduce disruptions during unexpected restarts.
Quick Machine Recovery automatically starts when your PC fails to boot after repeated attempts. The OS enters into the Windows Recovery Environment (WinRE), which is a lightweight recovery mode to troubleshoot boot issues.
WinRE has been a part of Windows for years, but QMR works by connecting it to the internet with Microsoft’s cloud diagnostics. It sends your PC’s diagnostic data to Microsoft’s servers, which will analyze the issue and try to push back a fix.
QMR downloads these fixes directly into WinRE and automatically reboots the PC. So, it makes work easier for IT admins who constantly have to deal with boot issues of other employees in an organization.
How does Quick Machine Recovery works in Windows 11?
In our tests, Windows Latest found that Quick Machine Recovery works with two main settings: cloud remediation and auto remediation.
Cloud remediation is what connects your PC with Microsoft’s cloud diagnostics when in a startup failure. When enabled, it securely shares diagnostic data, checks for known issues, and uses Windows Update during the recovery process. If disabled, your PC will switch to the usual Startup Repair option for local recovery.
Auto remediation builds on top of that. If enabled, the PC connects automatically to Windows Updates and may find a solution. But if it is unsuccessful, QMR retries automatically without the need for an IT admin. It is an automated cloud-connected repair loop, built into the OS itself. If disabled or not configured, the PC needs manual intervention to continue with OS recovery.
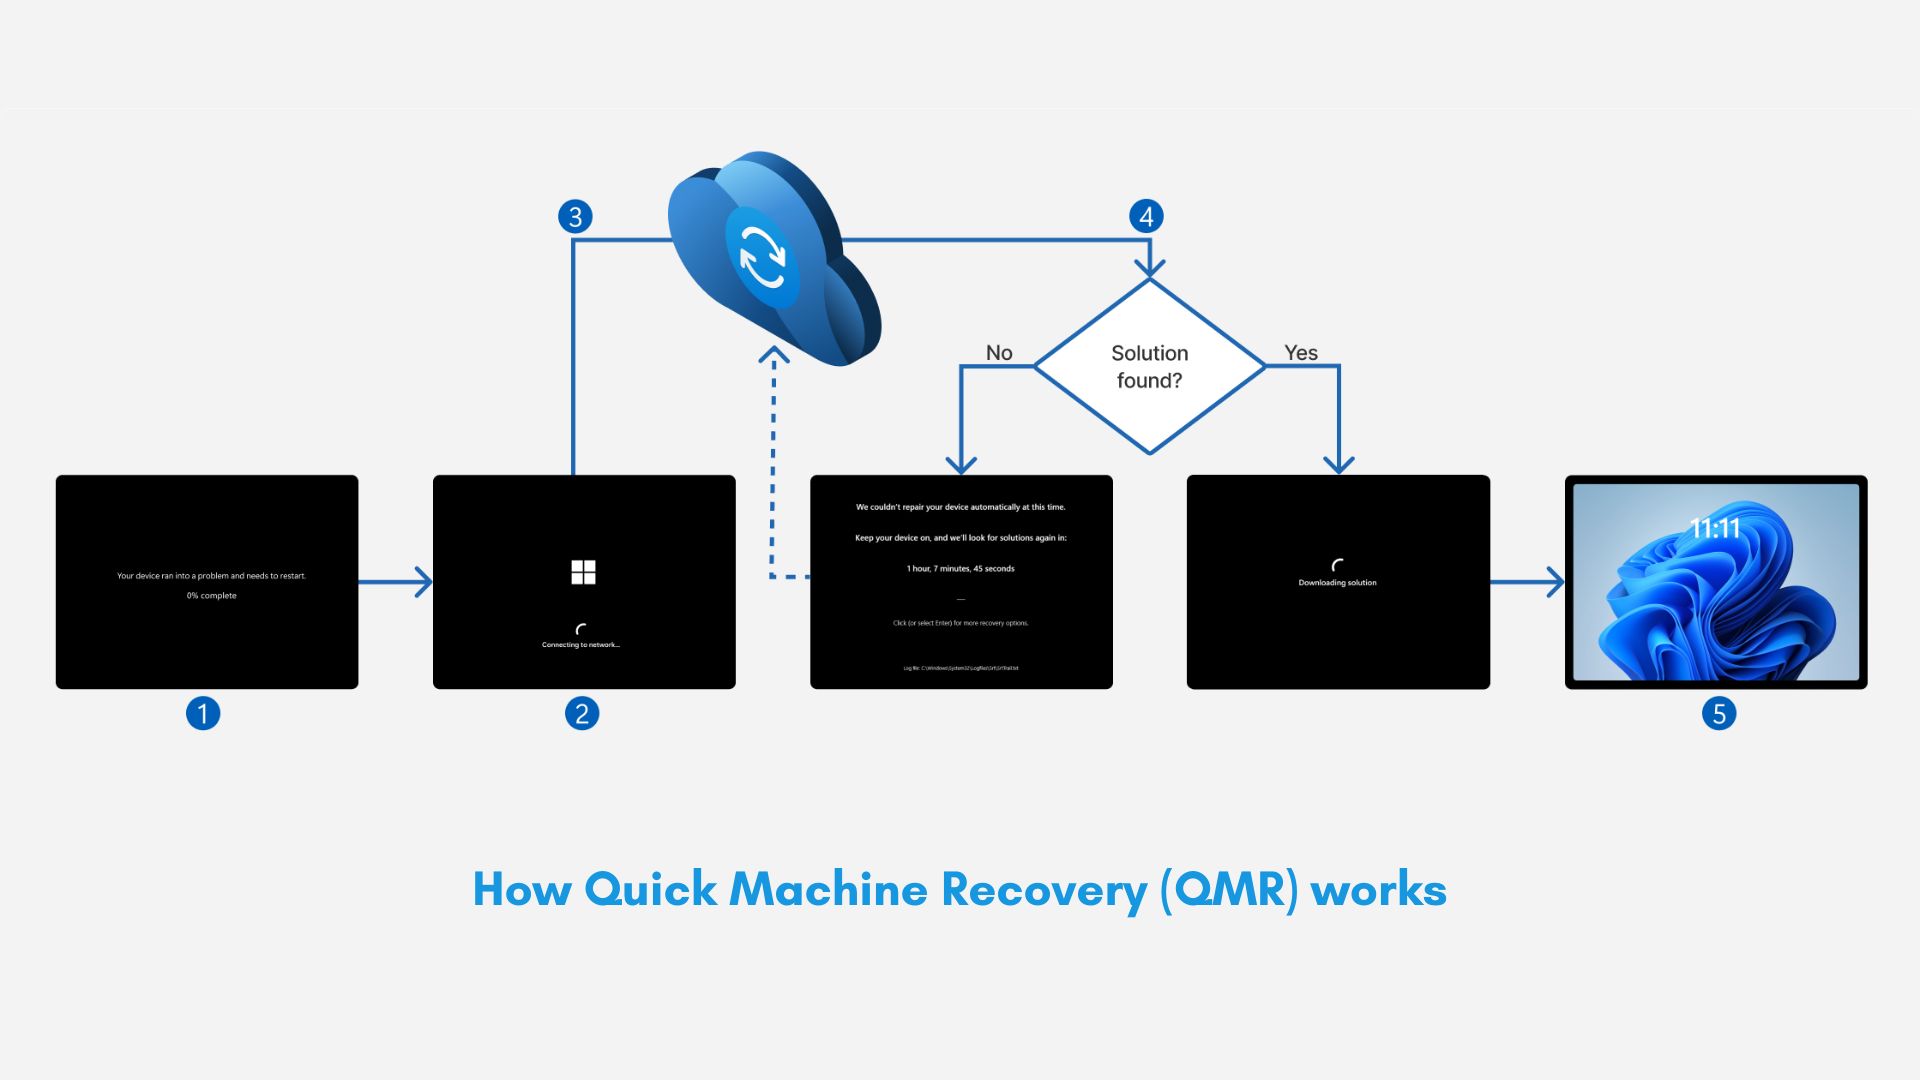
Here’s the entire working process of Quick Machine Recovery:
- Boot failure: During repeated boot startup failures, Windows recognizes it and starts the recovery process.
- WinRE enters the chat: Windows Recovery Environment is completely isolated from the main OS and runs independently to perform diagnostics and repair.
- Network connection gets established: WinRE first tries Ethernet, and if the PC isn’t connected to one, it tries the preconfigured Wi-Fi. If connected, the PC scans Windows Update for remediations.
- Cloud diagnostics and remediation: When connected, the PC sends diagnostics data to Microsoft, where the servers check for known issues such as telemetry, crash logs, update history, and configuration issues. If a fix is available, the system downloads and applies it. But if there isn’t any available solution, the PC retries the process after preset scanning intervals.
- Reboot and recover: The device reboots if a remediation is applied, and if it is successful, the PC reboots into Windows. But if it fails, the PC goes back to the WinRE again, and the whole process repeats.
Quick Machine Recovery is only available for Windows Insiders at the moment. We expect it to soon come to stable Windows versions too. To test the feature yourself, you’ll first need to be enrolled in the Windows Insider Program by going into Settings > Windows Update > Windows Insider Program.
Enable Quick Machine Recovery in Windows 11
Use the following steps to turn on and configure QMR:
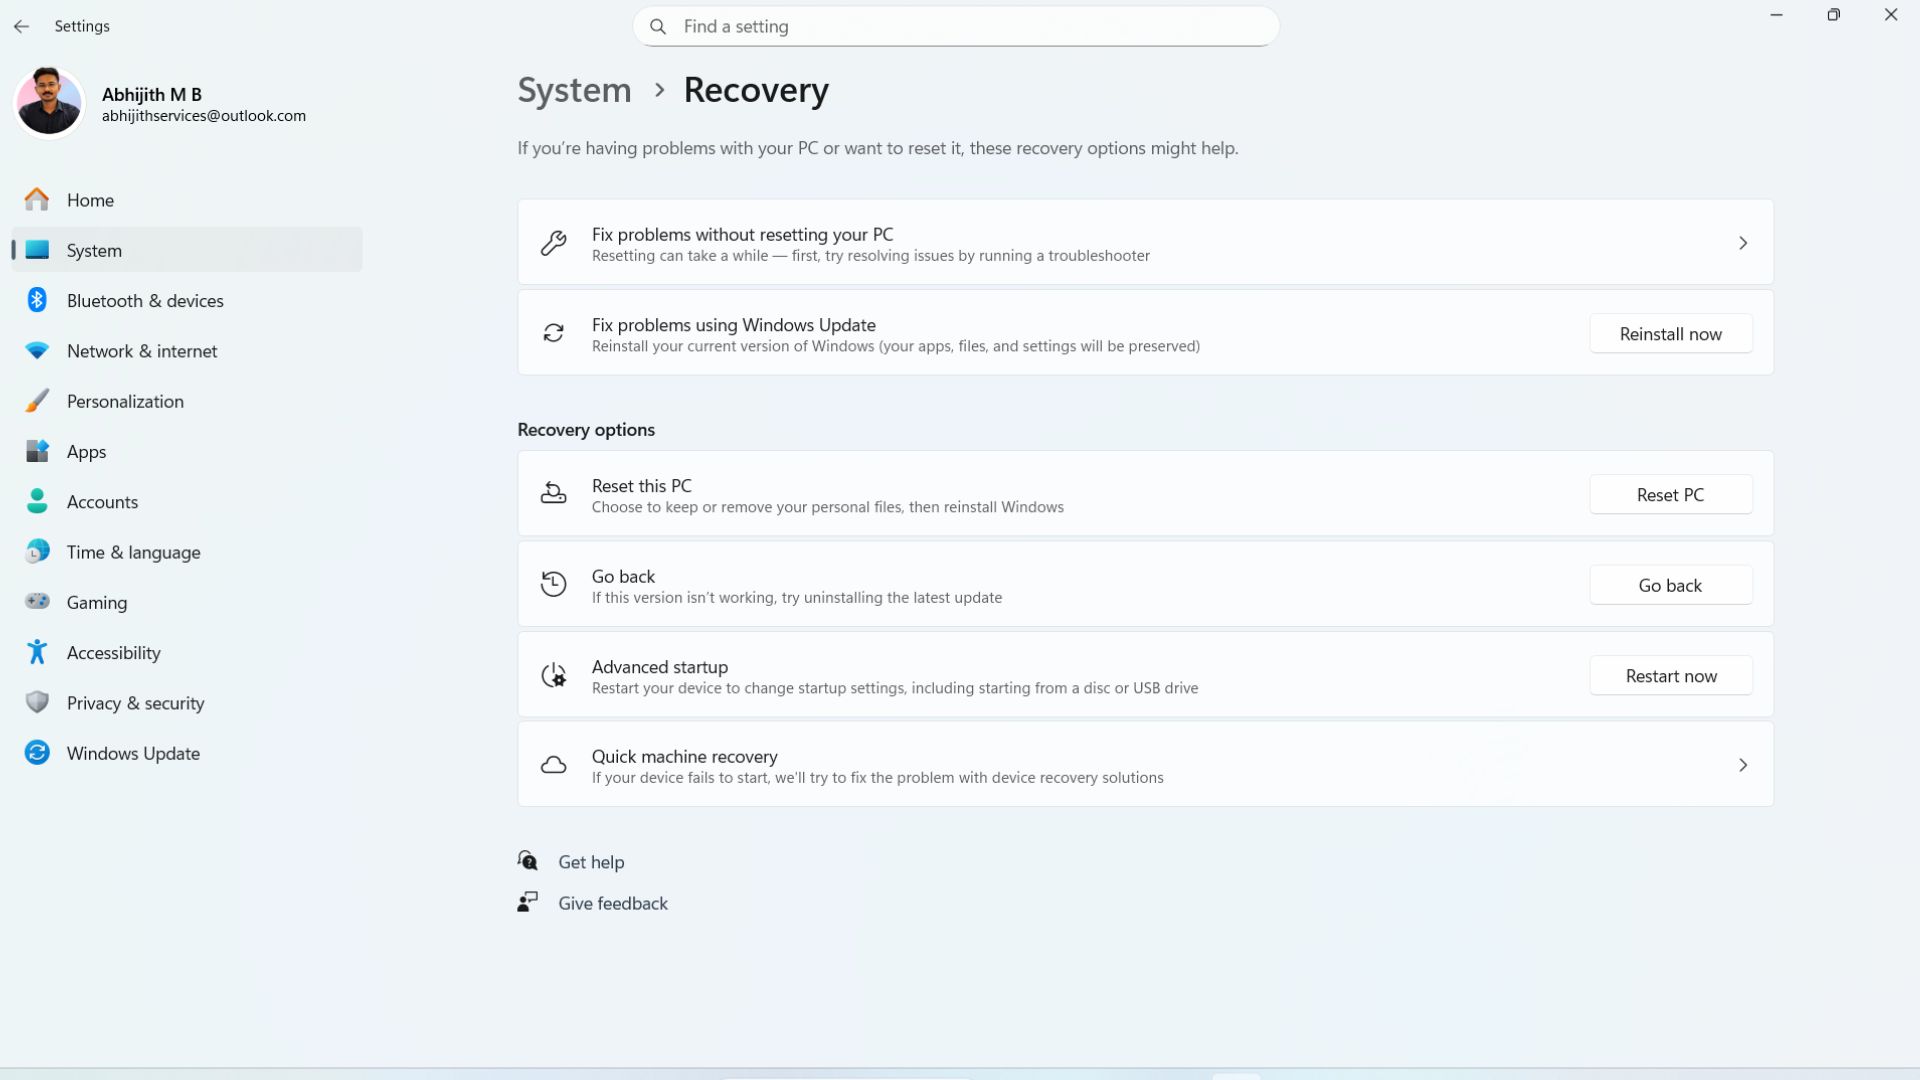
- Open Settings > System.
- Scroll down and click the Recovery option.
- The last option you’ll see is Quick machine recovery. Select it.
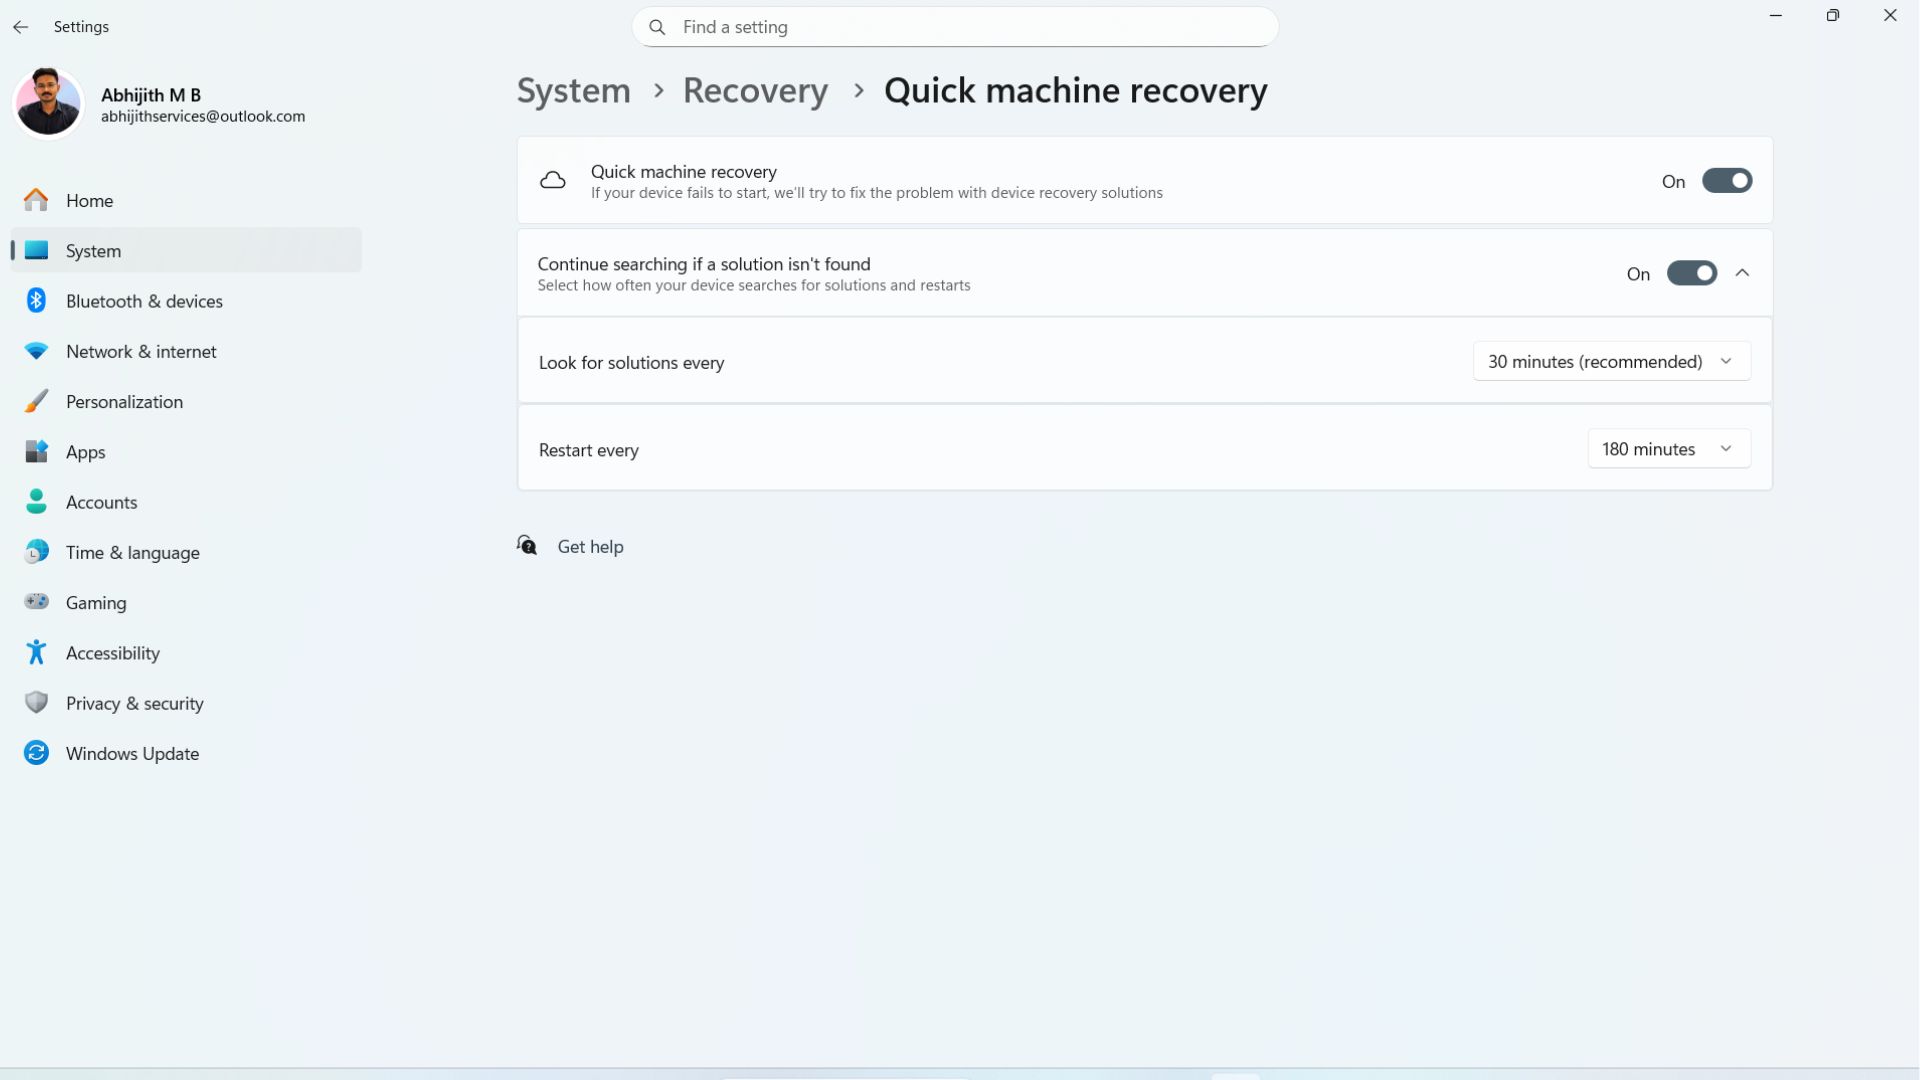
- Turn on the toggle for Quick machine recovery.
- Then the faded toggle for “Continue searching if a solution isn’t found” will become available. Enable it to get the full functions of QMR.
- Customize the time limit for the “Look for solutions every” option.
- Finally, choose the time for “Restart every”.
Now, whenever your PC goes into a boot failure, it will go into WinRE, and from there you can initiate Quick Recovery Machine.
How to test Quick Machine Recovery in Windows 11
Once you’ve enabled QMR, you can test it in a safe mode, which is actually a simulated crash environment. QMR natively provides this so that you wouldn’t have to go through a real boot crash to test the feature’s efficacy.
But in case you have some important files on your PC, you can create a backup with Windows Backup, and then restore it in case of an unfortunate system failure.
How I tested Quick Recovery Machine using Test Mode
This is only for a demonstration purpose. You don’t have to “test” the feature as it’s supposed to be used when you’re in trouble. Let me how I used test mode and tried QMR.
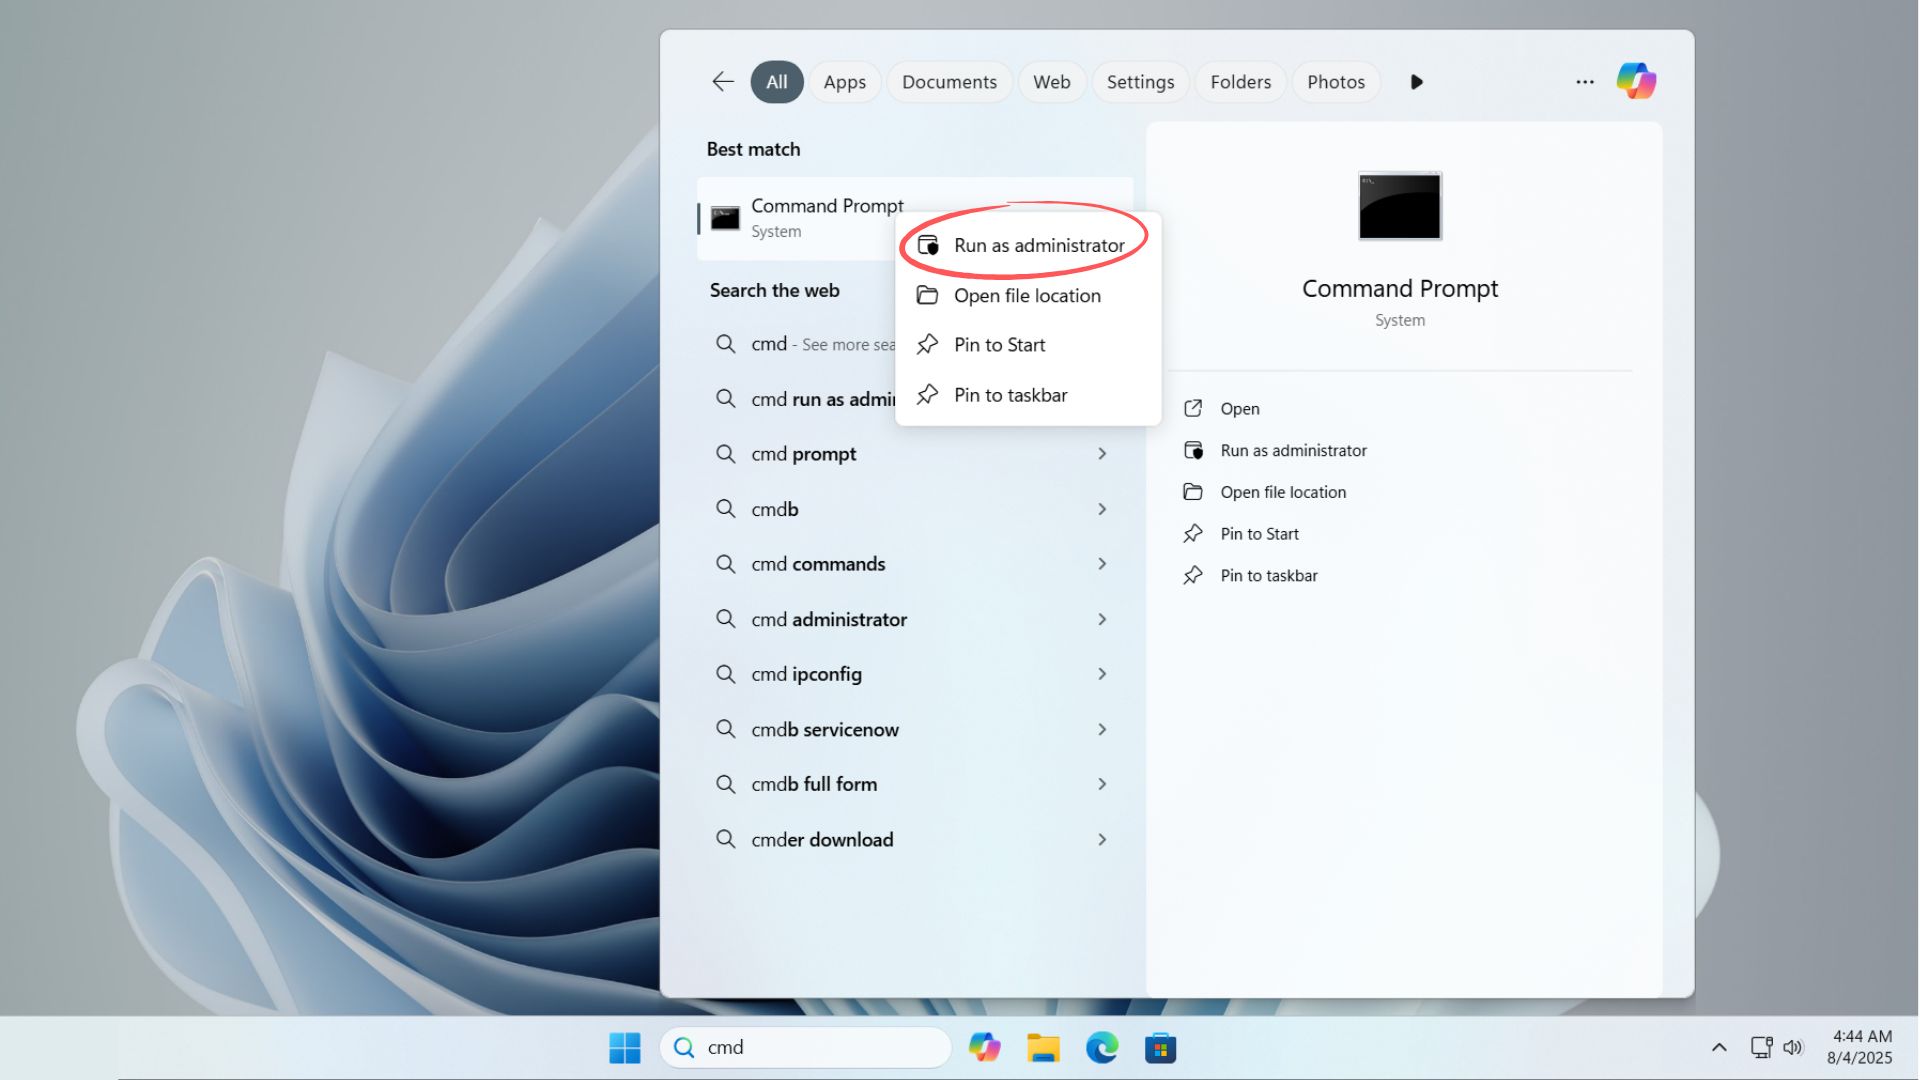
First, I opened Command Prompt as Administrator:
To do this, type cmd in the Windows Search bar, right-click Command Prompt, and select Run as Administrator.
Enable Recovery Test mode:
Type the command reagentc /SetRecoveryTestmode.
This command activates test mode for QMR and tells Windows to simulate a boot failure without corrupting your existing OS.
Boot into Windows Recovery Environment:
You can force your PC to enter WinRE with the command reagentc /BootToRe.
This command prevents the system from booting into normal Windows and instead launches WinRE.
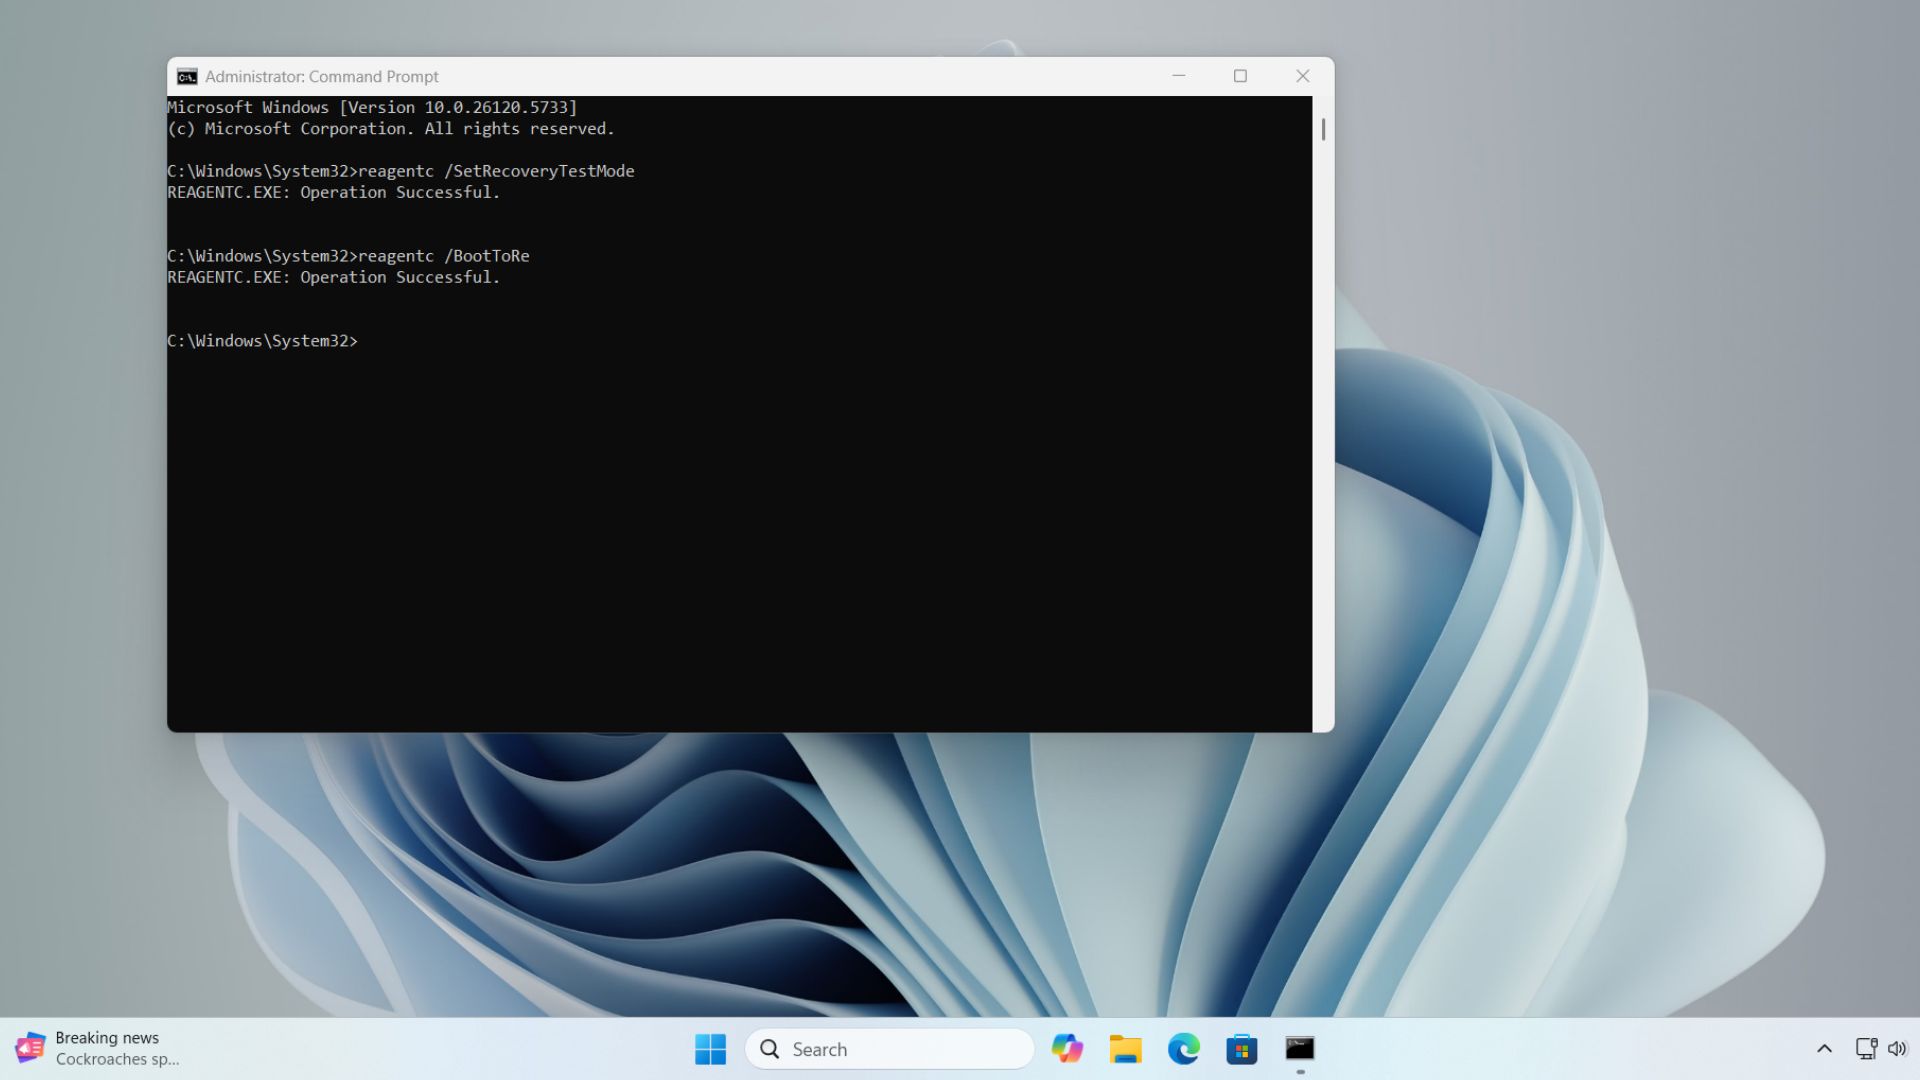
Now, you can close the command prompt window and restart your PC. While it boots up, instead of loading Windows, it will boot directly into the Recovery Environment.
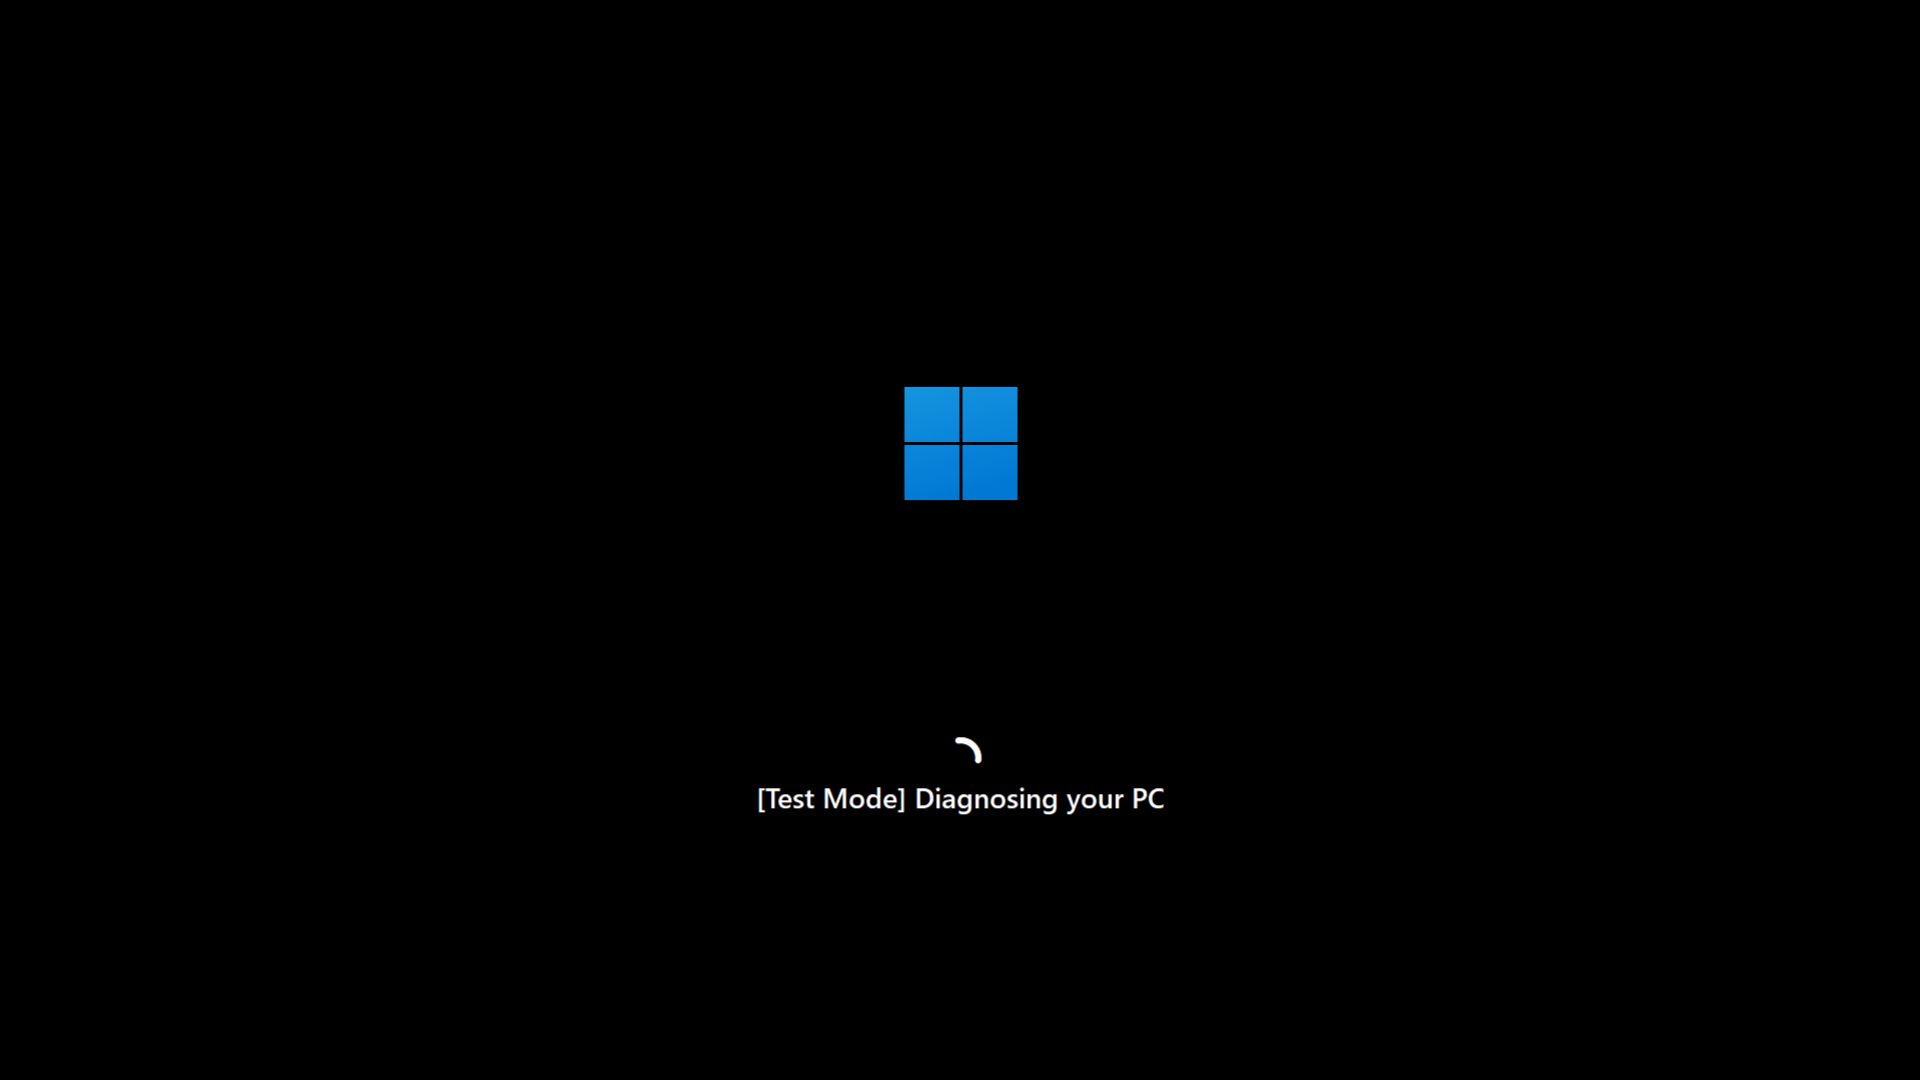
Windows Latest simulated Quick Machine Recovery in our virtual machine. While rebooting, Windows opened into a Test Mode, which diagnosed the PC. Then the simulated QMR connected to the internet, and started looking for solutions. And since our VM lacked any issues, it started booting into normal Windows.

Now, you need to exit the Test Mode. Use the following commands to exit QMS simulation environment: Open the command prompt again, and type the command: reagentc /disable.
This command turns off WinRE entirely, unlinks the recovery image, and disables any recovery environment behaviours.
But to restore WinRE, you need to enable it again with the command: reagentc /enable.
This command reconnects the recovery image (usually winre.wim) and allows Windows to use all recovery tools, such as Startup Repair, and even QMR.
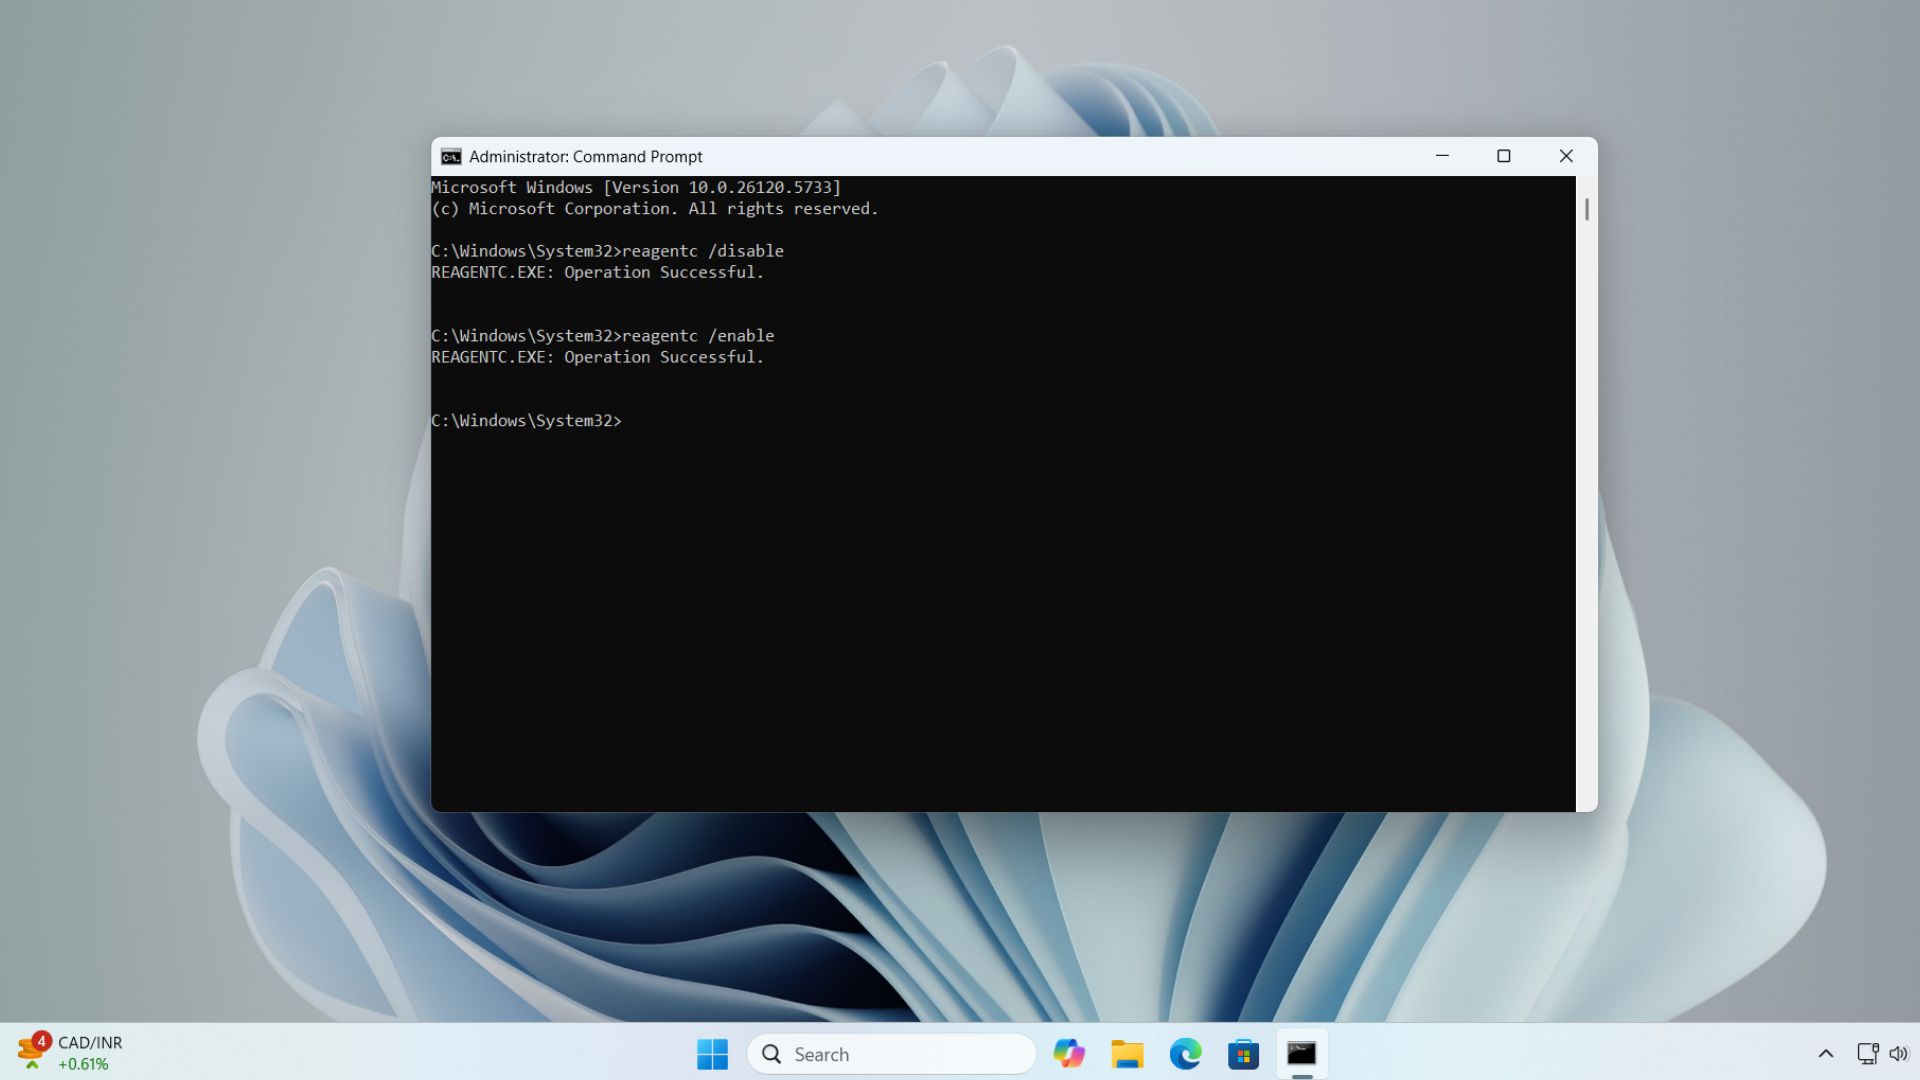
As for why we need to use both these commands to properly exit test mode, the PC may remain in a modified recovery state after running QMR in Test Mode. Running the /disable command clears that state. Then the /enable command brings back WinRE online. The commands combined are like a reset sequence.
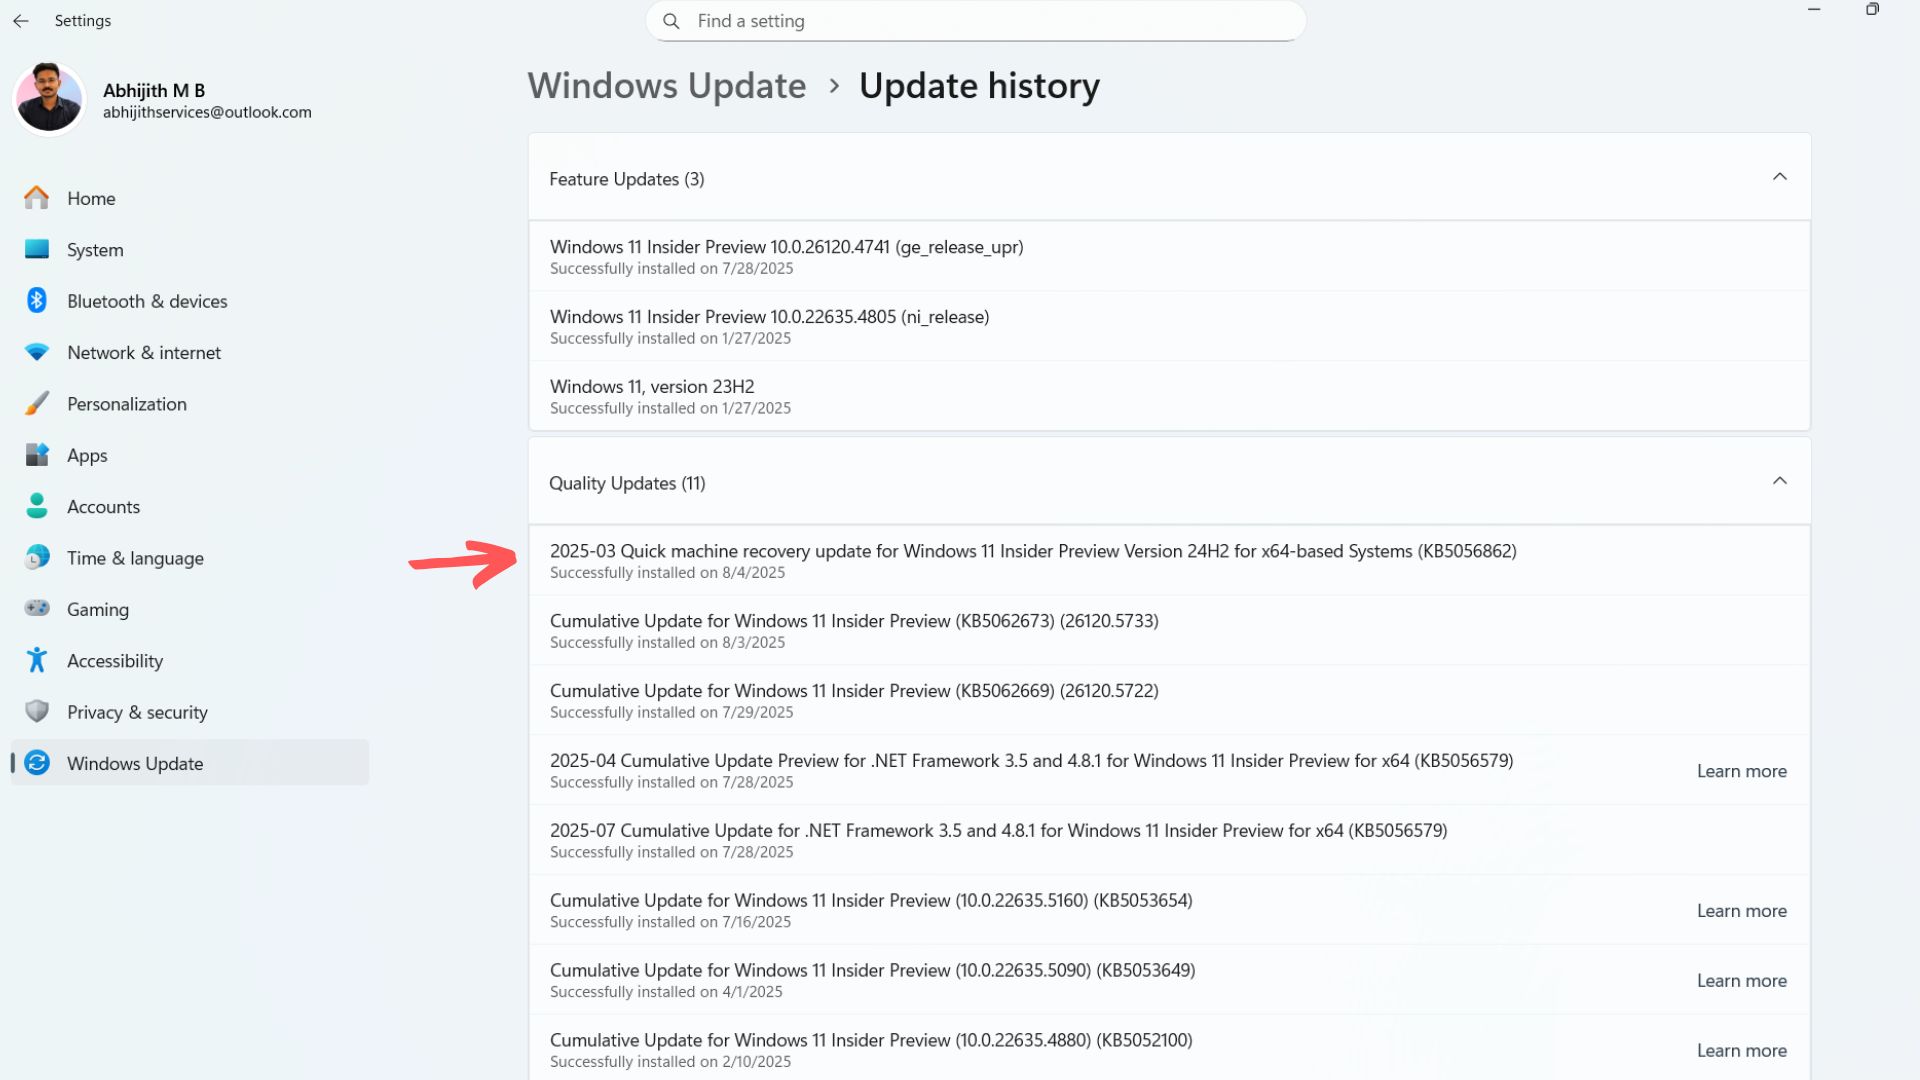
Verify QMR remediation
If QMR adds a remediation to your PC, you’ll see it under Windows Update in Settings. Go to Update History and you’ll see this update listed in the Quality updates section.
Limitations of Quick Machine Recovery
There is no denying the fact that QMR is a great leap forward in reducing downtime. But it is not foolproof.
- QMR only works if the PC can connect to the internet, so either Ethernet or pre-configured WI-Fi is necessary.
- QMR presently supports only WPA/WPA2 secured networks and lacks support for WI-Fi WPA2-Enterprise. This feature may come soon, as the QMR is mainly aimed at the enterprise market.
- Not a replacement for full backups, as QMR doesnt restore user files or reverse system-wide changes.
- Only targets known issues, as QMR relies on Microsoft’s backend to find fixes from a database of existing fixes.
- QMR needs Microsoft Intune for full customization, which is not something regular users can set up casually.
We appreciate Microsoft’s efforts in making Windows more stable and reliable, but fixing the underlying issues and bugs that cause such boot issues should be the higher priority.


")
")

 and it removes old modem drivers")
