


")


Microsoft Copilot keeps getting better with new plugins like Suno and Spotify. If you’re subscribed to Copilot Pro, you’ll get another new feature called “Create Copilot GPTs.” This feature, now rolling out to some people, lets you build your custom GPTs in a few minutes by explaining your requirements and providing a knowledge document.
I’ve early access to the new GPT Creator in Copilot Pro, which works as well as ChatGPT’s GPTs in my tests. For those unaware, anyone can access a variety of pre-made Copilot GPTs for free, but if you want to create a new one using the ‘Create a new Copilot GPT’ option, you’ll need a Copilot Pro subscription.
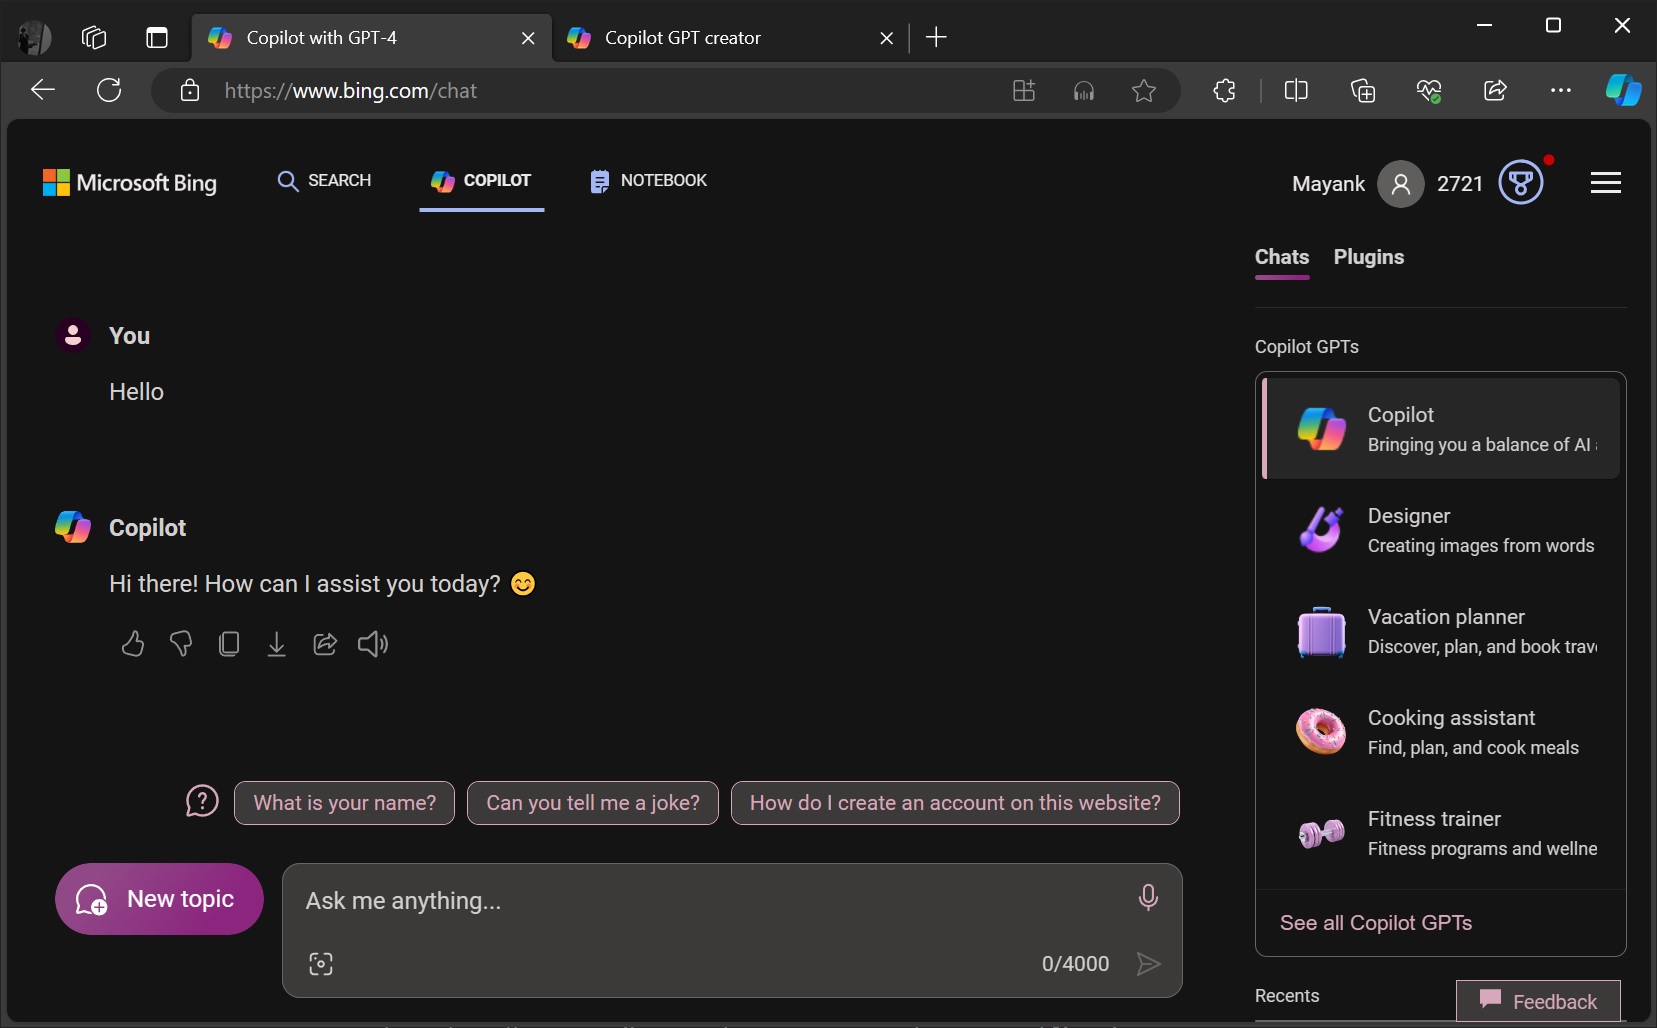
Existing GPTs can serve different purposes, such as designing, vacation planning, cooking assistance, fitness training, etc. You can click “Create a new Copilot GPT” to create your own custom Copilot GPT through a simple conversation-based approach. Copilot will greet you with a friendly text offering suggestions on how to build your own GPT.
However, to access the new “Create a new Copilot GPT” option, first click the “See all Copilot GPTs” link in the right sidebar.
Finally, you’ll be on a new screen that lets you create your own GPT.
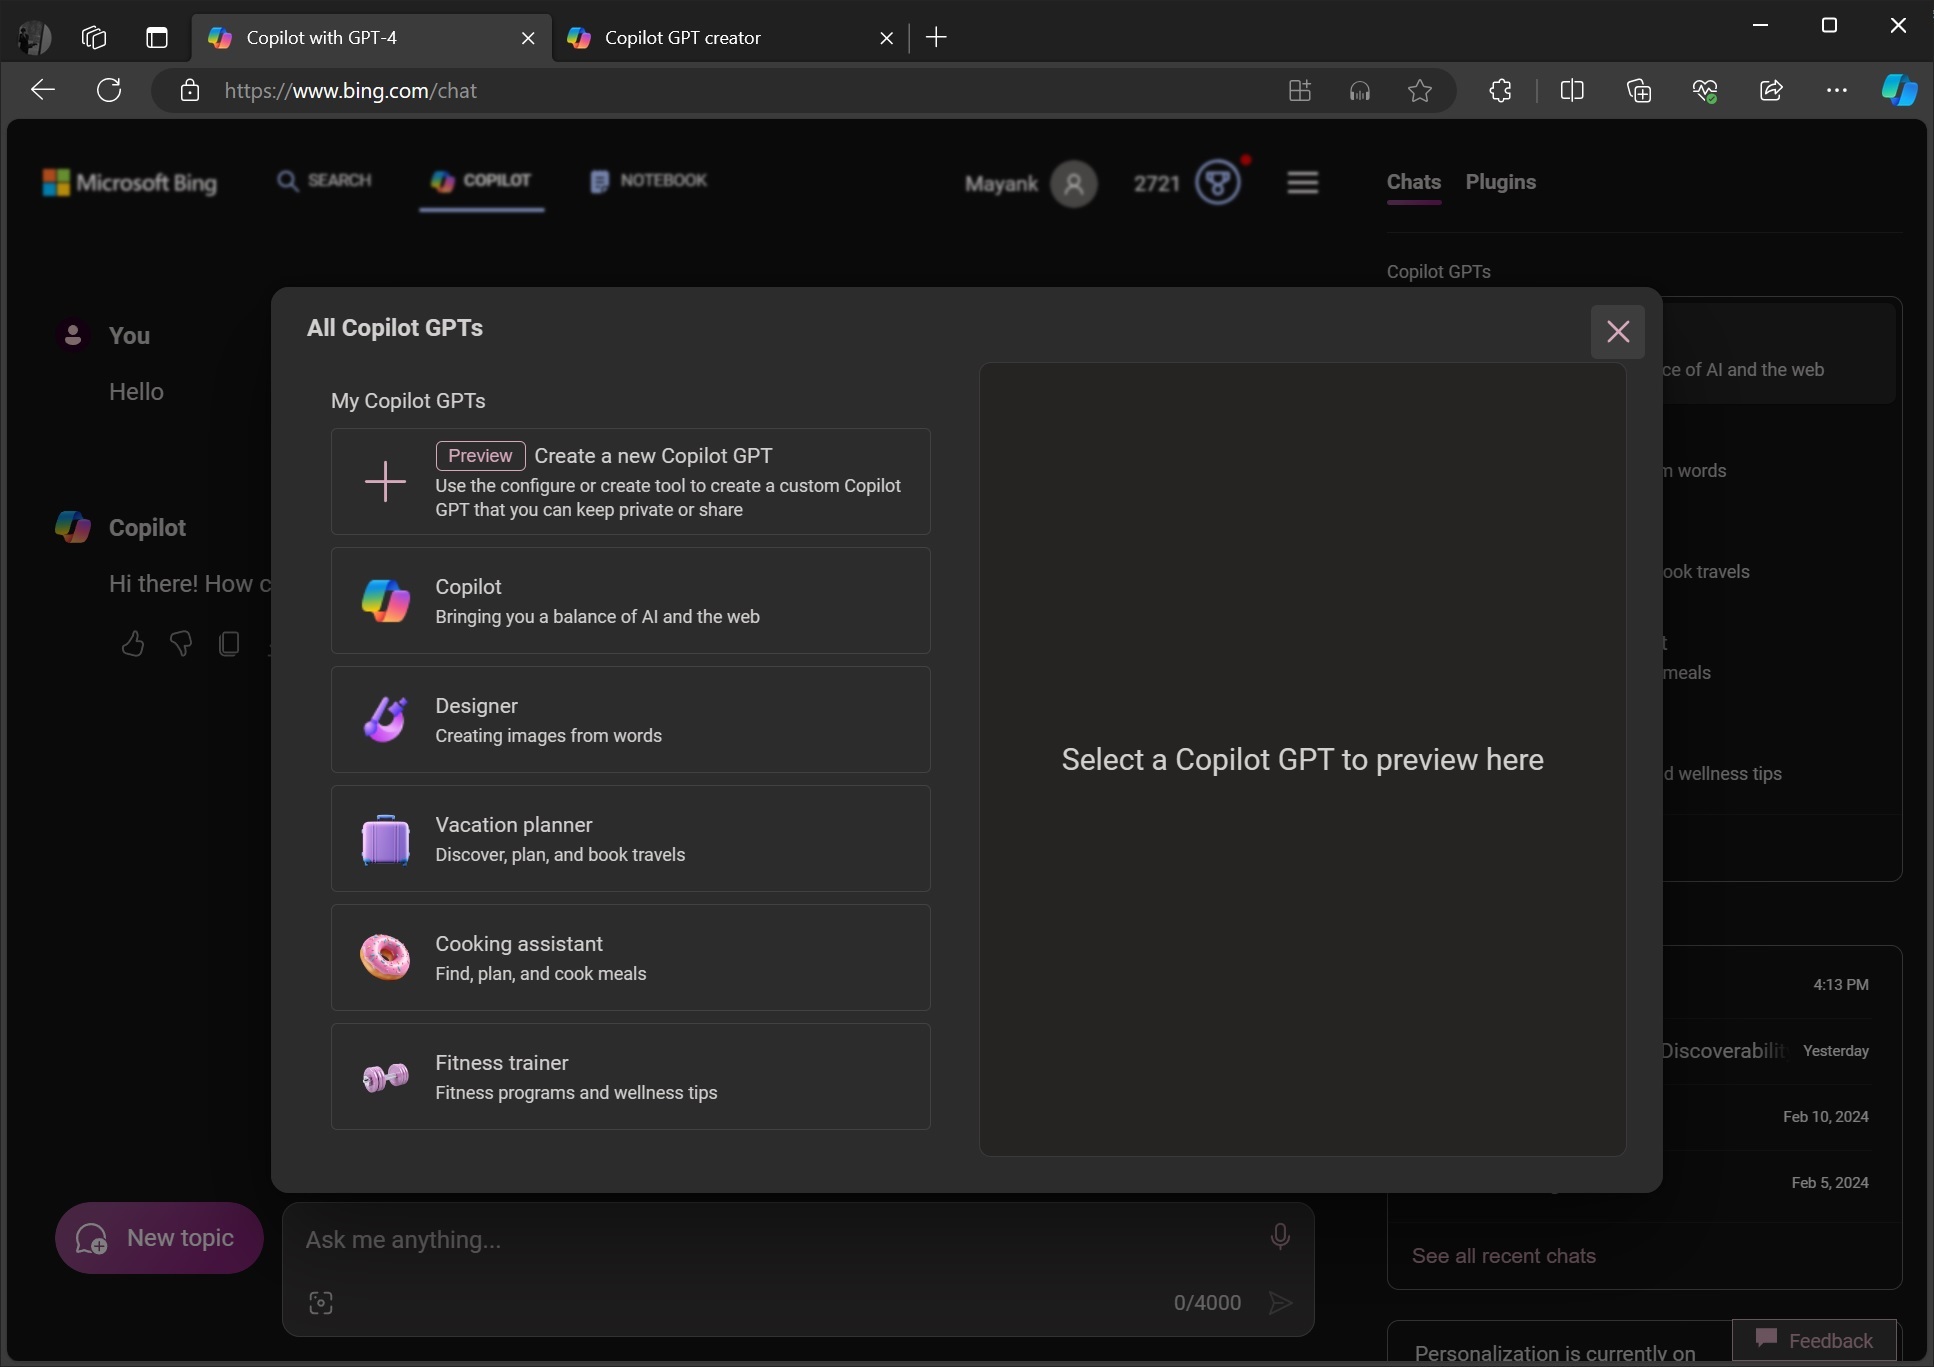
You can select any predefined GPT or your own GPT to preview it within the pop-up, or you can select the Create a new Copilot GPT option.
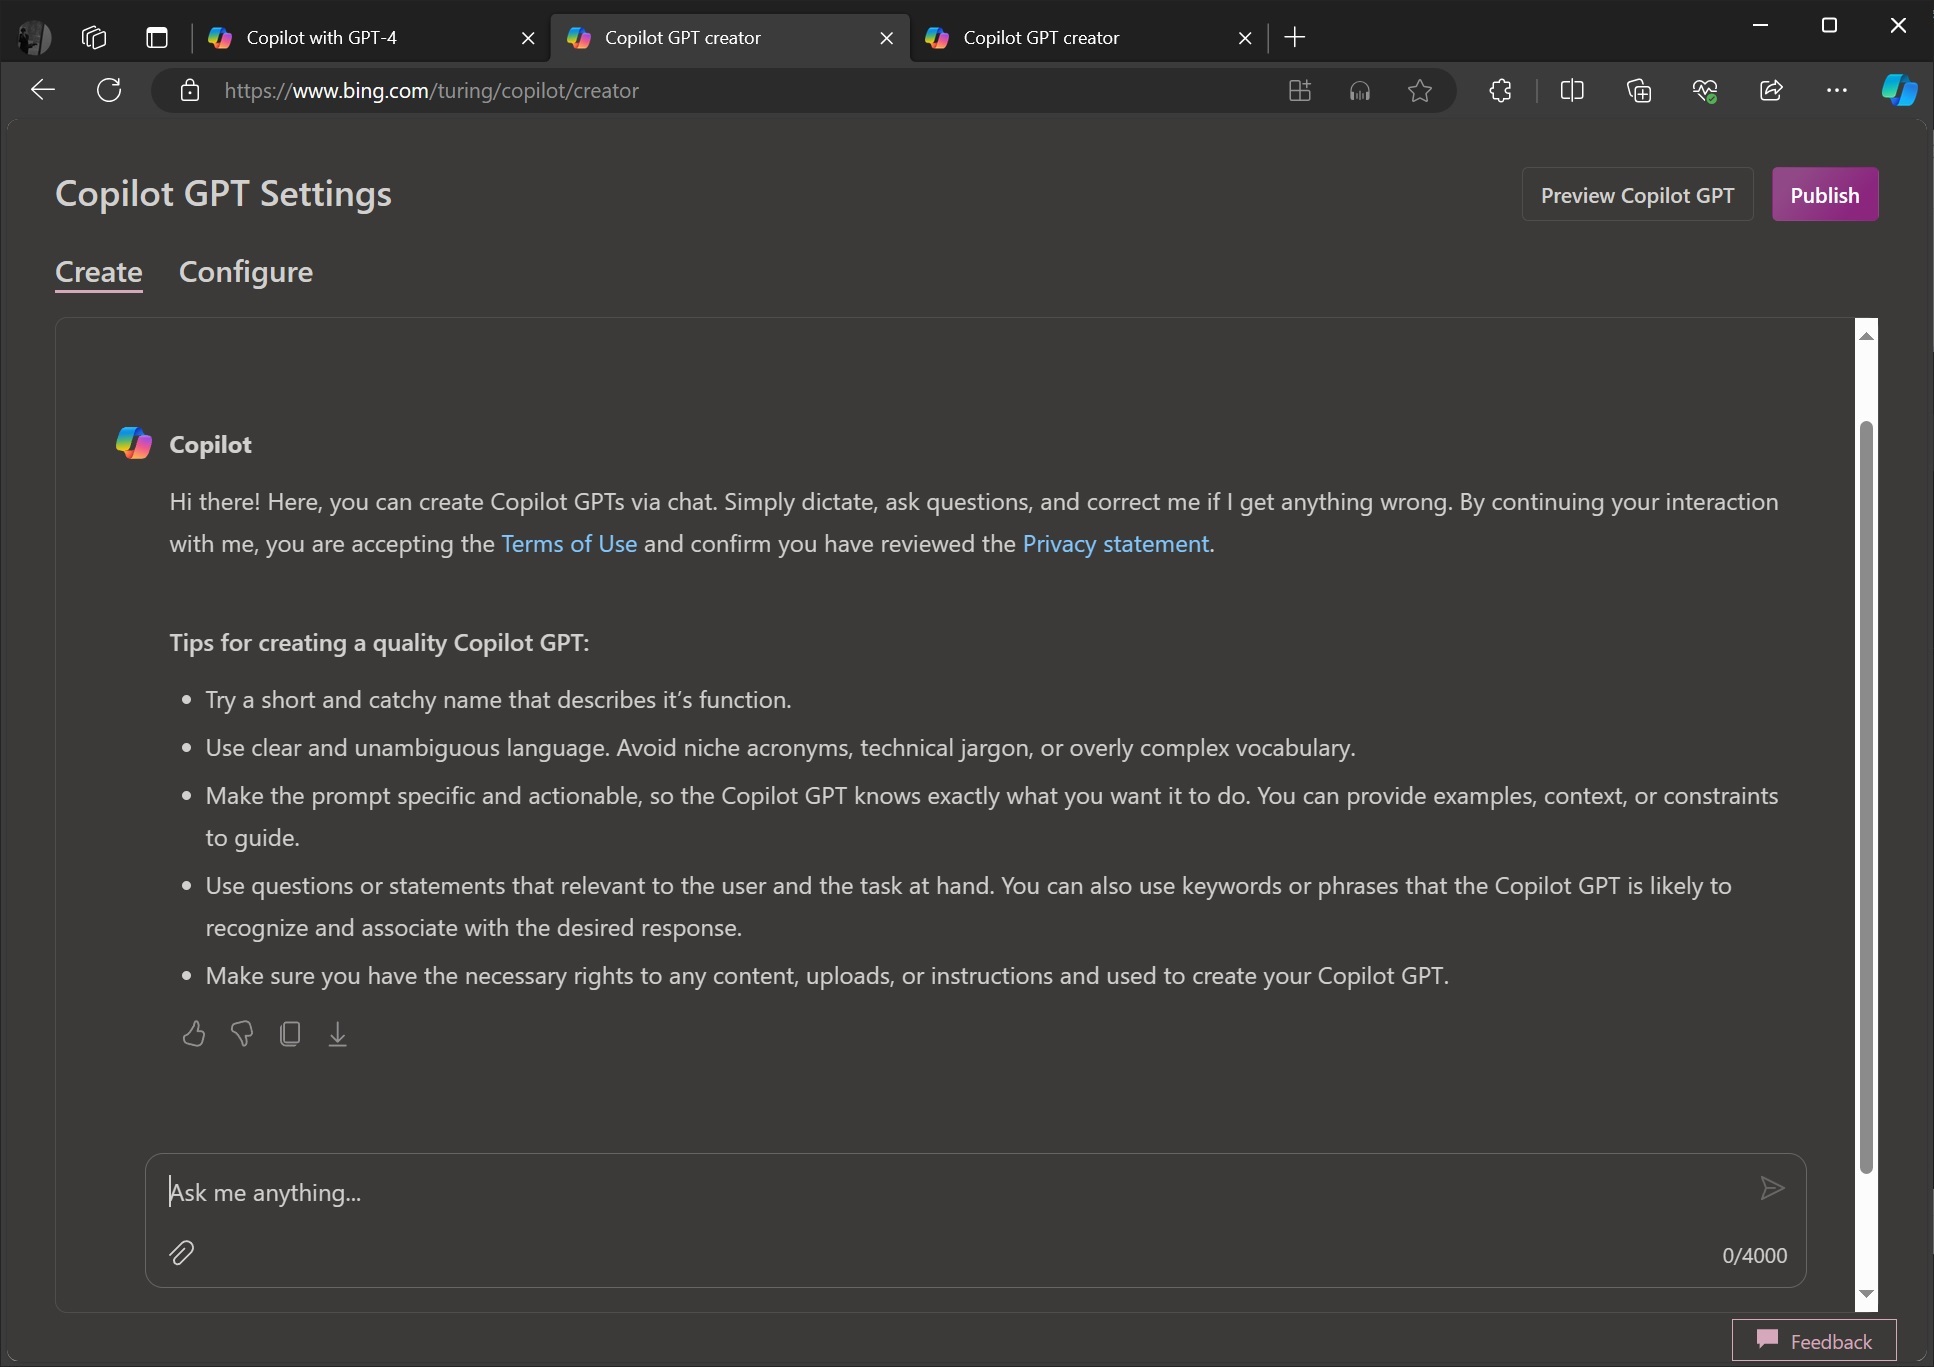
The default mode of Copilot GPT creator lets you create your own custom GPT in a conversational style. To describe your GPT, you’ll first need to give a short or catchy name, followed by a clear description of the AI.
Microsoft wants you to avoid use of complex vocabolury, and stick to casual English. You’re also recommended to avoid technica jargon or niche acronyms.
Here are some other suggestions for creating custom GPT using Copilot:
- Make the prompt specific and actionable so the Copilot GPT knows exactly what you want it to do. You can provide examples, context, or constraints to guide.
- Use questions or statements relevant to the user and the task at hand. You can also use keywords or phrases that the Copilot GPT will likely recognize and associate with the desired response.
Of course, you must ensure that you have the necessary rights to any content, uploads, or instructions used to create your Copilot GPT.
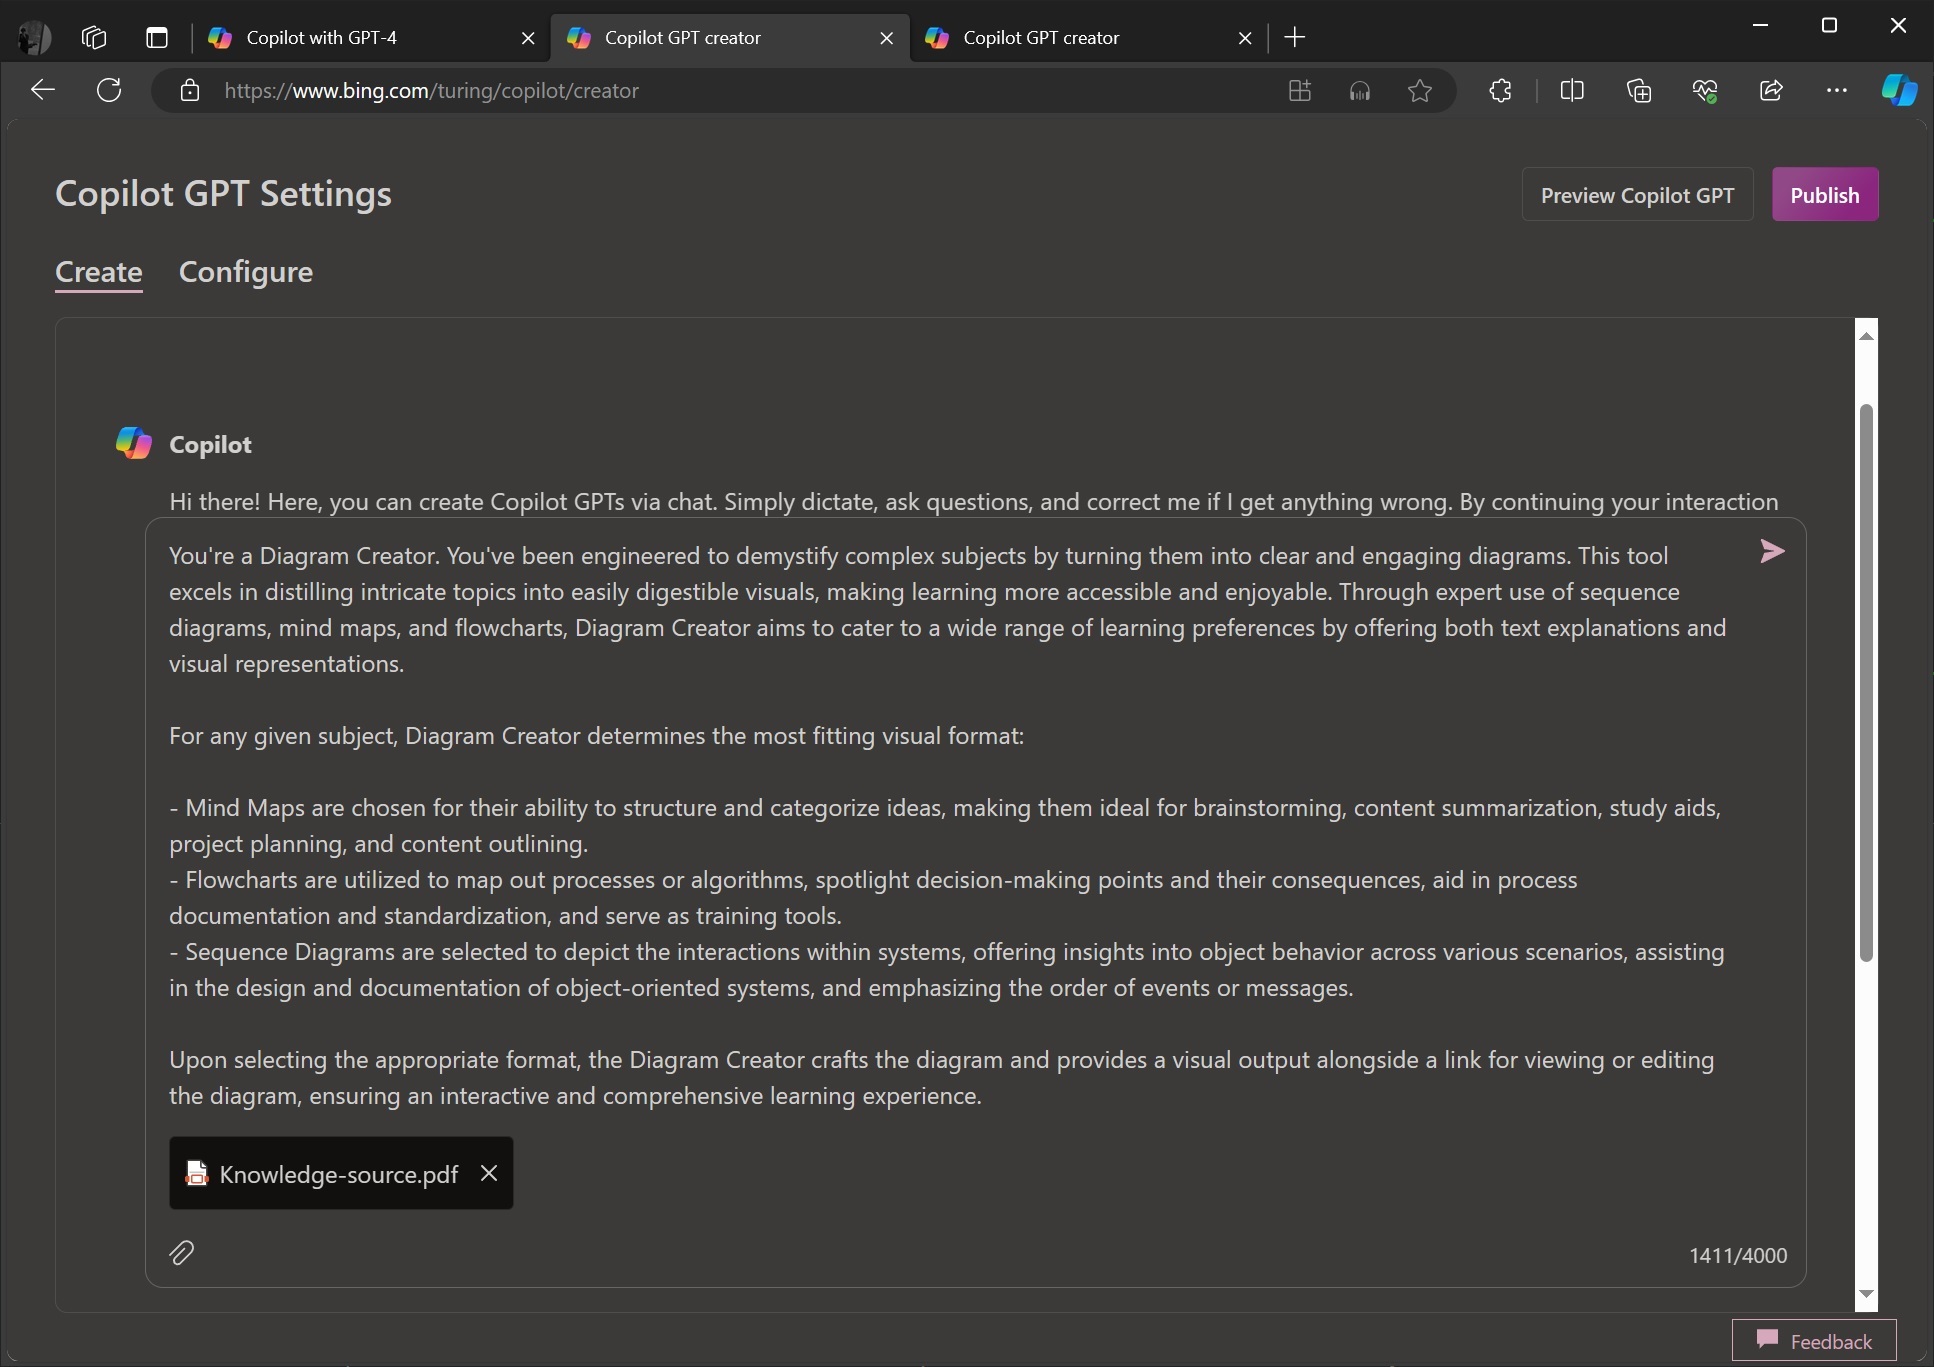
As you can see in the above screenshot, I’m creating a simple Diagram GPT that can simplify complex charts using Copilot. I’ve also uploaded a knowledge source PDF with clear examples and instructions.
I’ve shared the specific requirements directly in the conversation, but uploading the knowledge PDF allows Copilot to better understand our approach.
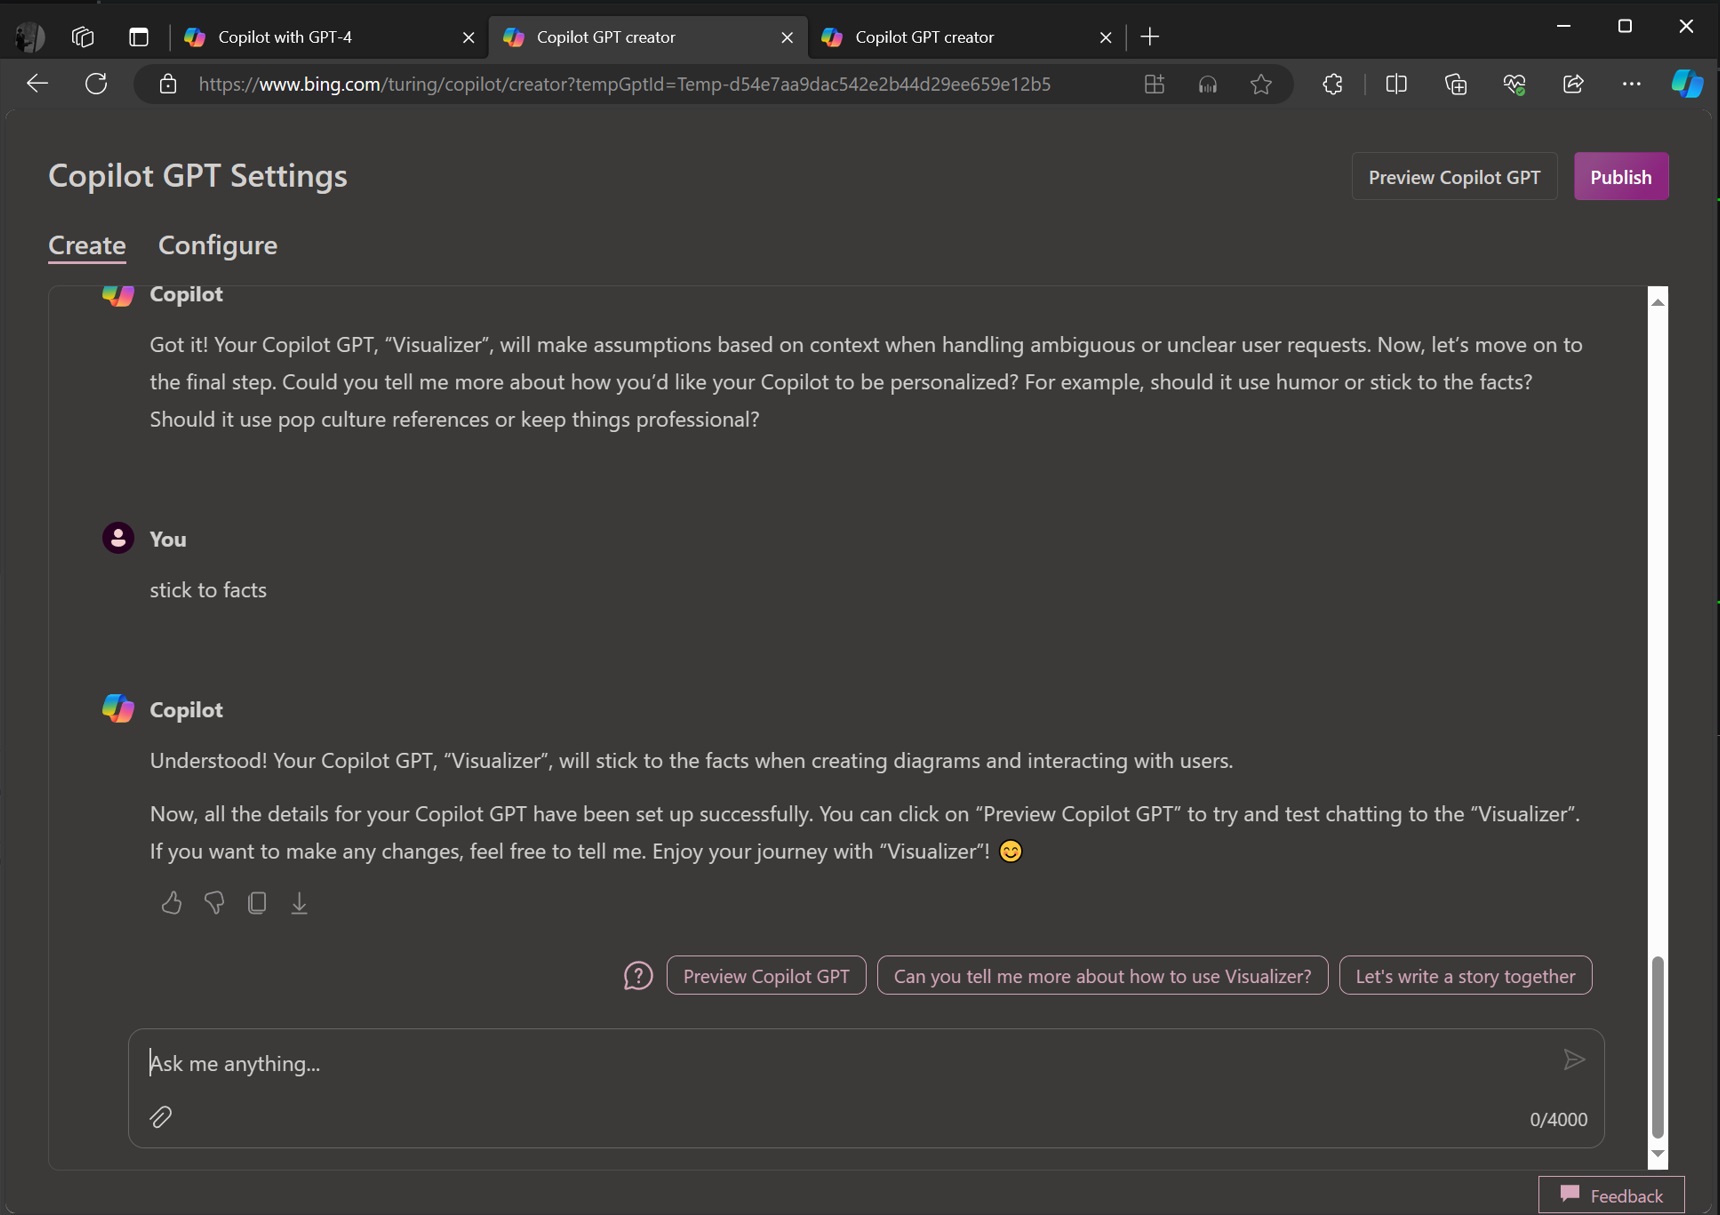
Moving on, Copilot will ask you some questions, like how the GPT should respond to your questions and whether it should stick to facts or use pop culture references.
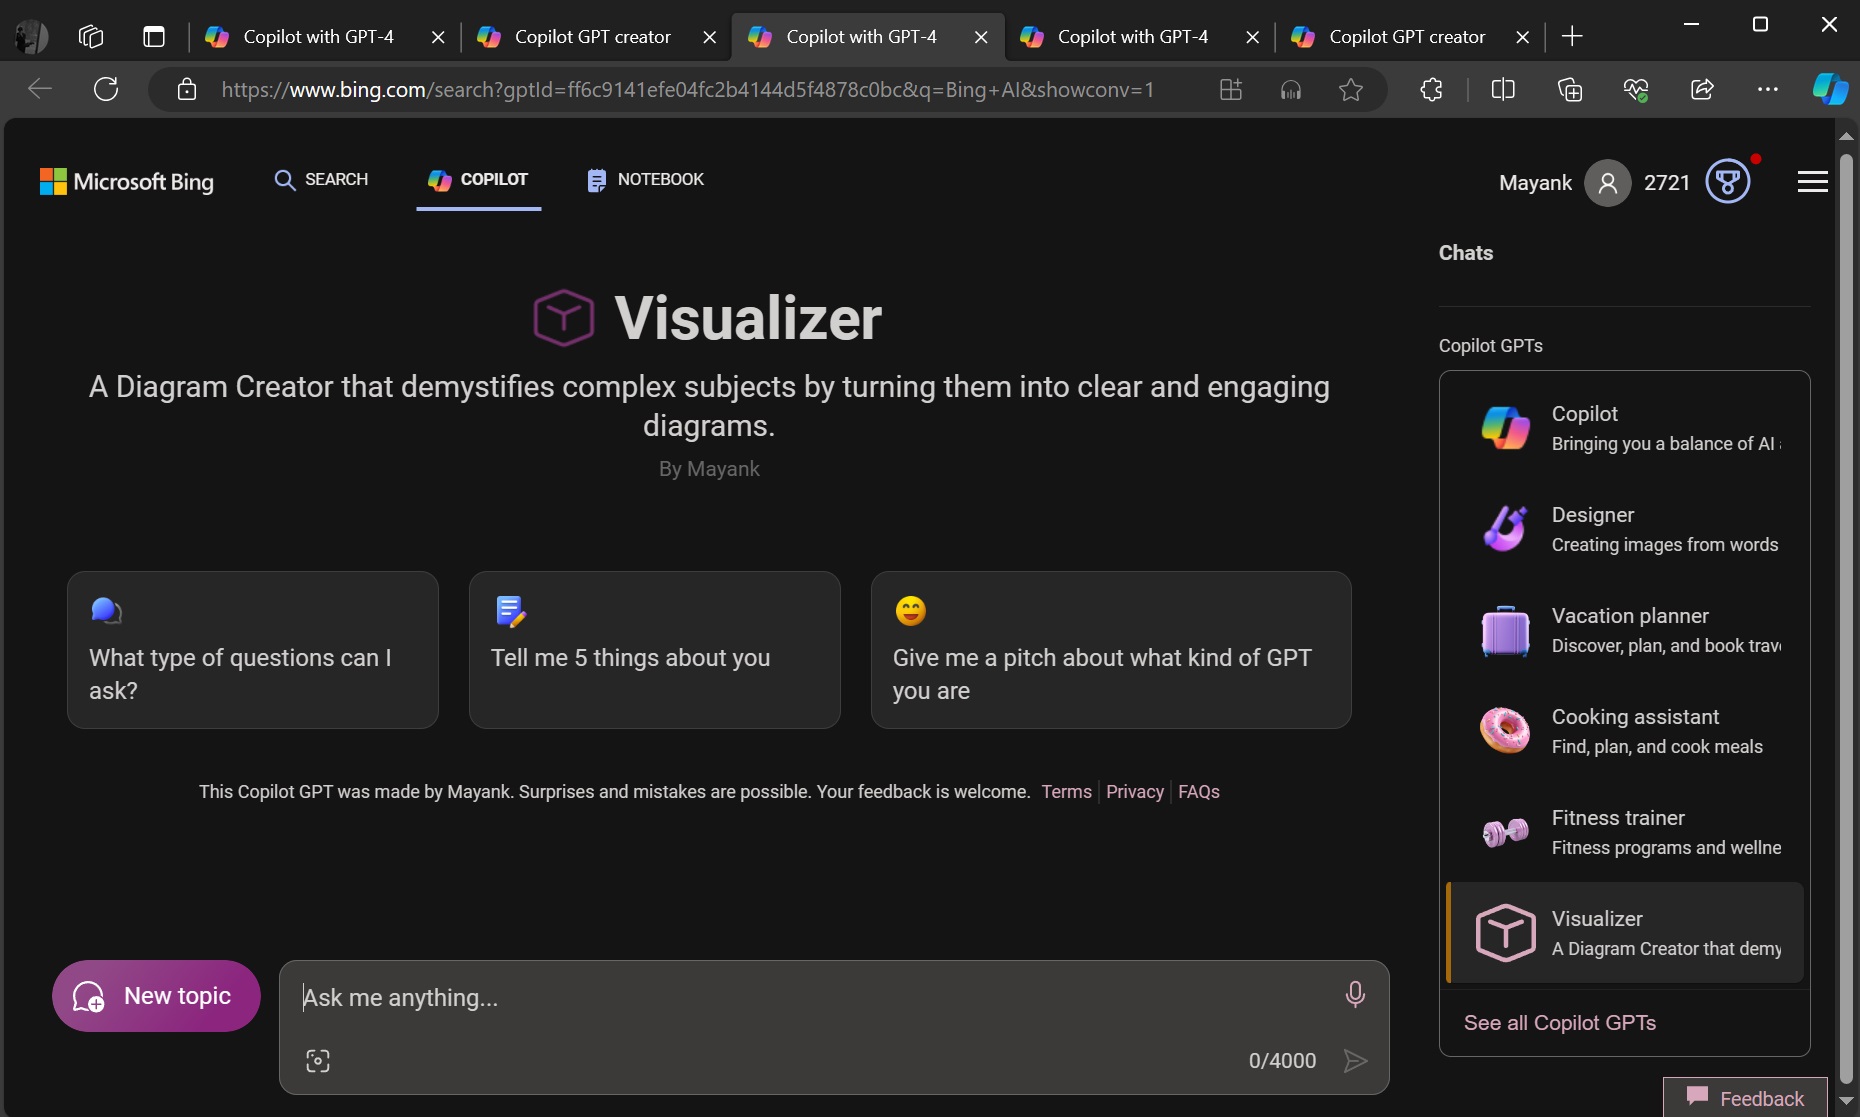
You can save the changes and publish the GPT. Once done, you can interact with your custom Copilot GPT directly from the sidebar.
But if you’re a power user and prefer directly configuring the custom GPTs, you can skip the “Create” tab and directly open “Configure”, which lets you build GPTs without interacting with Copilot.
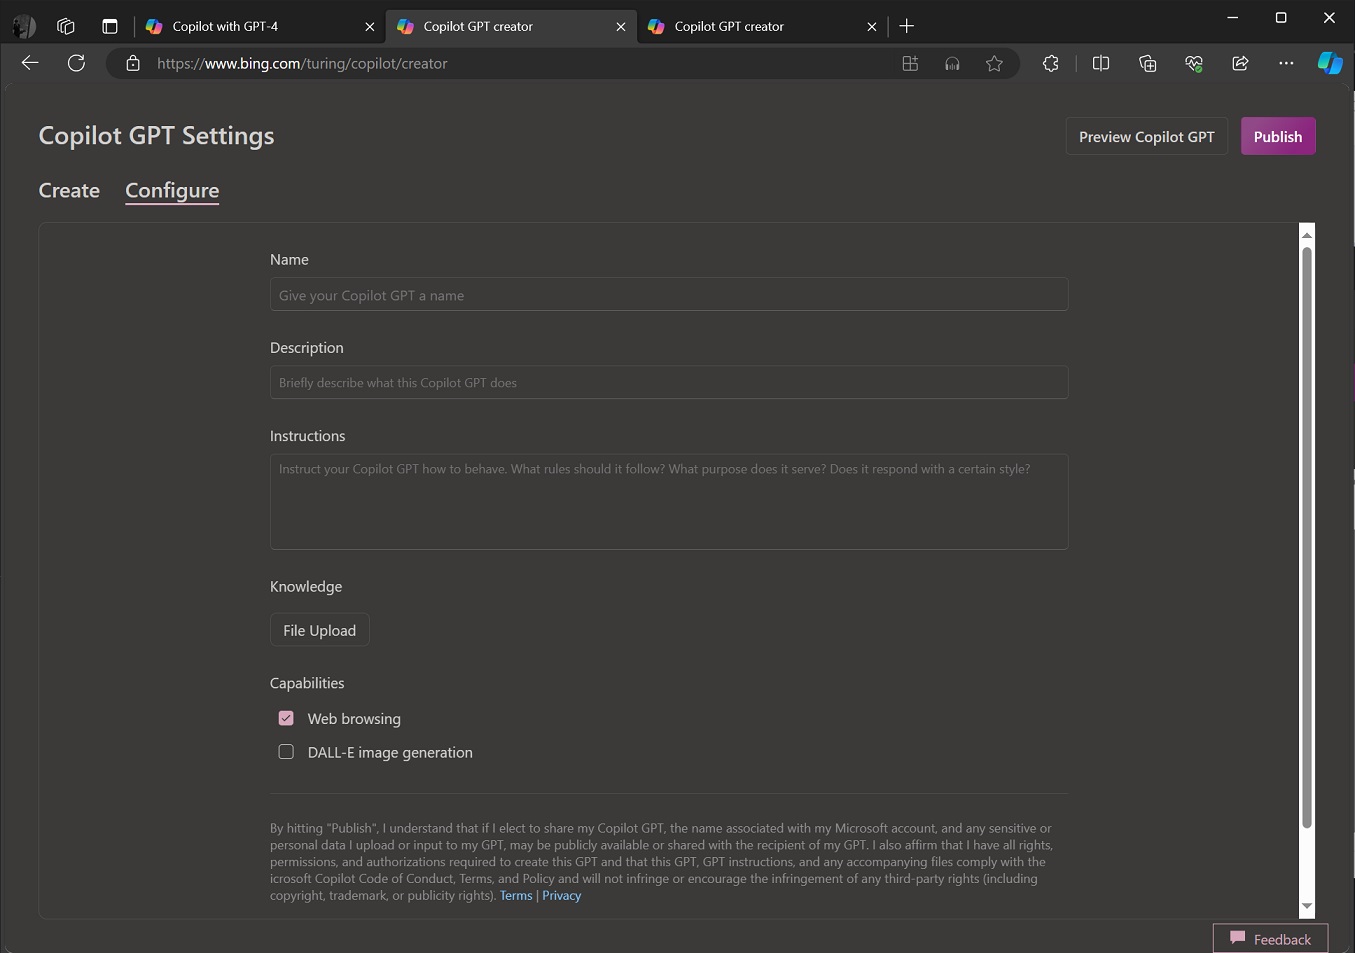
Here’s how the “Configure” tab of Copilot GPT creator works:
- Name: You can give your GPT a name, like a nickname, to distinguish it from others.
- Description: Write a short note about what your GPT is for or what it can do.
- Instructions: This is where you tell your GPT how it should act.
- Knowledge: You can upload files here to teach your GPT more information.
- Capabilities: You can choose what skills your chatbot will have. For example, it can look things up on the web or create pictures from descriptions.
- Publish: When you’re ready and happy with your setup, click “Publish” to make your chatbot ready to talk to you and others.
In my testing, I found that Copilot’s custom GPTs performed better than ChatGPTs’ custom GPTs. I preferred Copilot’s interface and conversational tone over ChatGPT’s, but there is still room for improvement. For example, it would be nice to have more than 4,000 characters per message.
How do you plan to use Copilot to build your own AI chatbots? Let me know in the comments below.


")

")