


")

")
")

 and it removes old modem drivers")

Windows comes with a rather lesser-known feature called Windows Sandbox, which is a testing environment for executable files. By default, this feature doesn’t support the Microsoft Store, but we have found a simple workaround that enables it with a PowerShell script.
What is Windows Sandbox?
Windows Sandbox was launched by the end of 2018 with Windows 10 version 1903. The idea was to provide an isolated and temporary virtual PC environment where you can install suspicious software or open sketchy documents without having them impact your actual PC.
Everything needed to run Sandbox comes built into Windows, so you wouldn’t have to install a virtual hard disk. However, the feature is only available for Windows 11 Pro and Enterprise. The same versions of Windows 10 also support Sandbox.
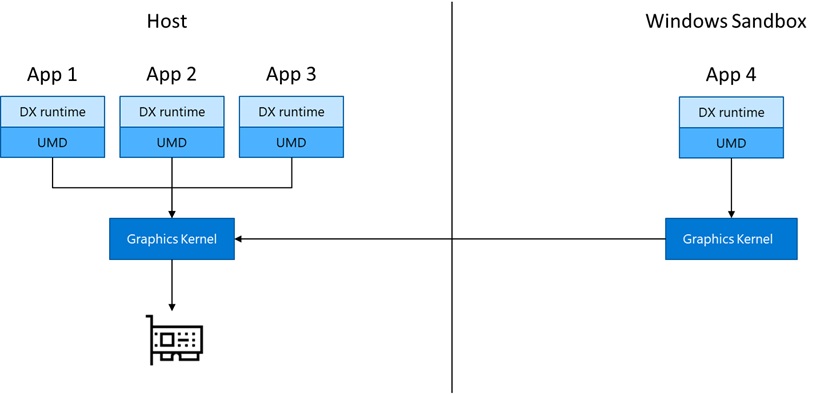
Software installed in the Sandbox doesn’t affect your PC in any way, and once you close it, all app installations, files, and changes will be deleted. That’s because it uses hardware-assisted virtualization to create a distinct kernel environment, using Microsoft’s hypervisor. So, Sandbox runs completely isolated from the host PC, and it’s like a fresh install of Windows every time you open it.
This security, along with the fast user experience, courtesy of an integrated kernel scheduler, smart memory management, and a virtual GPU, is what makes Sandbox better than virtual machines for testing applications.
However, the lack of native support for Microsoft Store was disappointing as the Store now has a great collection of apps.
Why I wanted the Microsoft Store in Windows Sandbox
As you’d expect, we test a lot of software here at Windows Latest, and we had our fair share of app installs that bogged down our system, which meant that we had to reset our PCs multiple times.
Ever since I learned about Sandbox, I have used it to run executable files, check installers, and open files that I downloaded from unreliable sources.
By the way, you can directly drag and drop files on your desktop to the Sandbox. Such an easy file transfer isn’t possible in a traditional VM.
Some of the tools and apps I wanted to try, especially smaller utilities or media apps, are only available in the Microsoft Store. Sure, I could sideload installation packages, but that defeats the point of quickly firing up a safe test environment.
But with the Microsoft Store inside Sandbox, I could test how Store apps would behave in a fresh Windows install.
Prerequisites for installing the Microsoft Store in the Sandbox
If you already have Sandbox enabled on your PC, you just need to know how to paste and execute a PowerShell script.
But if you haven’t enabled Sandbox, remember that you can’t have it on Windows Home edition. You’ll need Pro or Enterprise.
Then your PC must also have hardware virtualization enabled in the BIOS/UEFI.
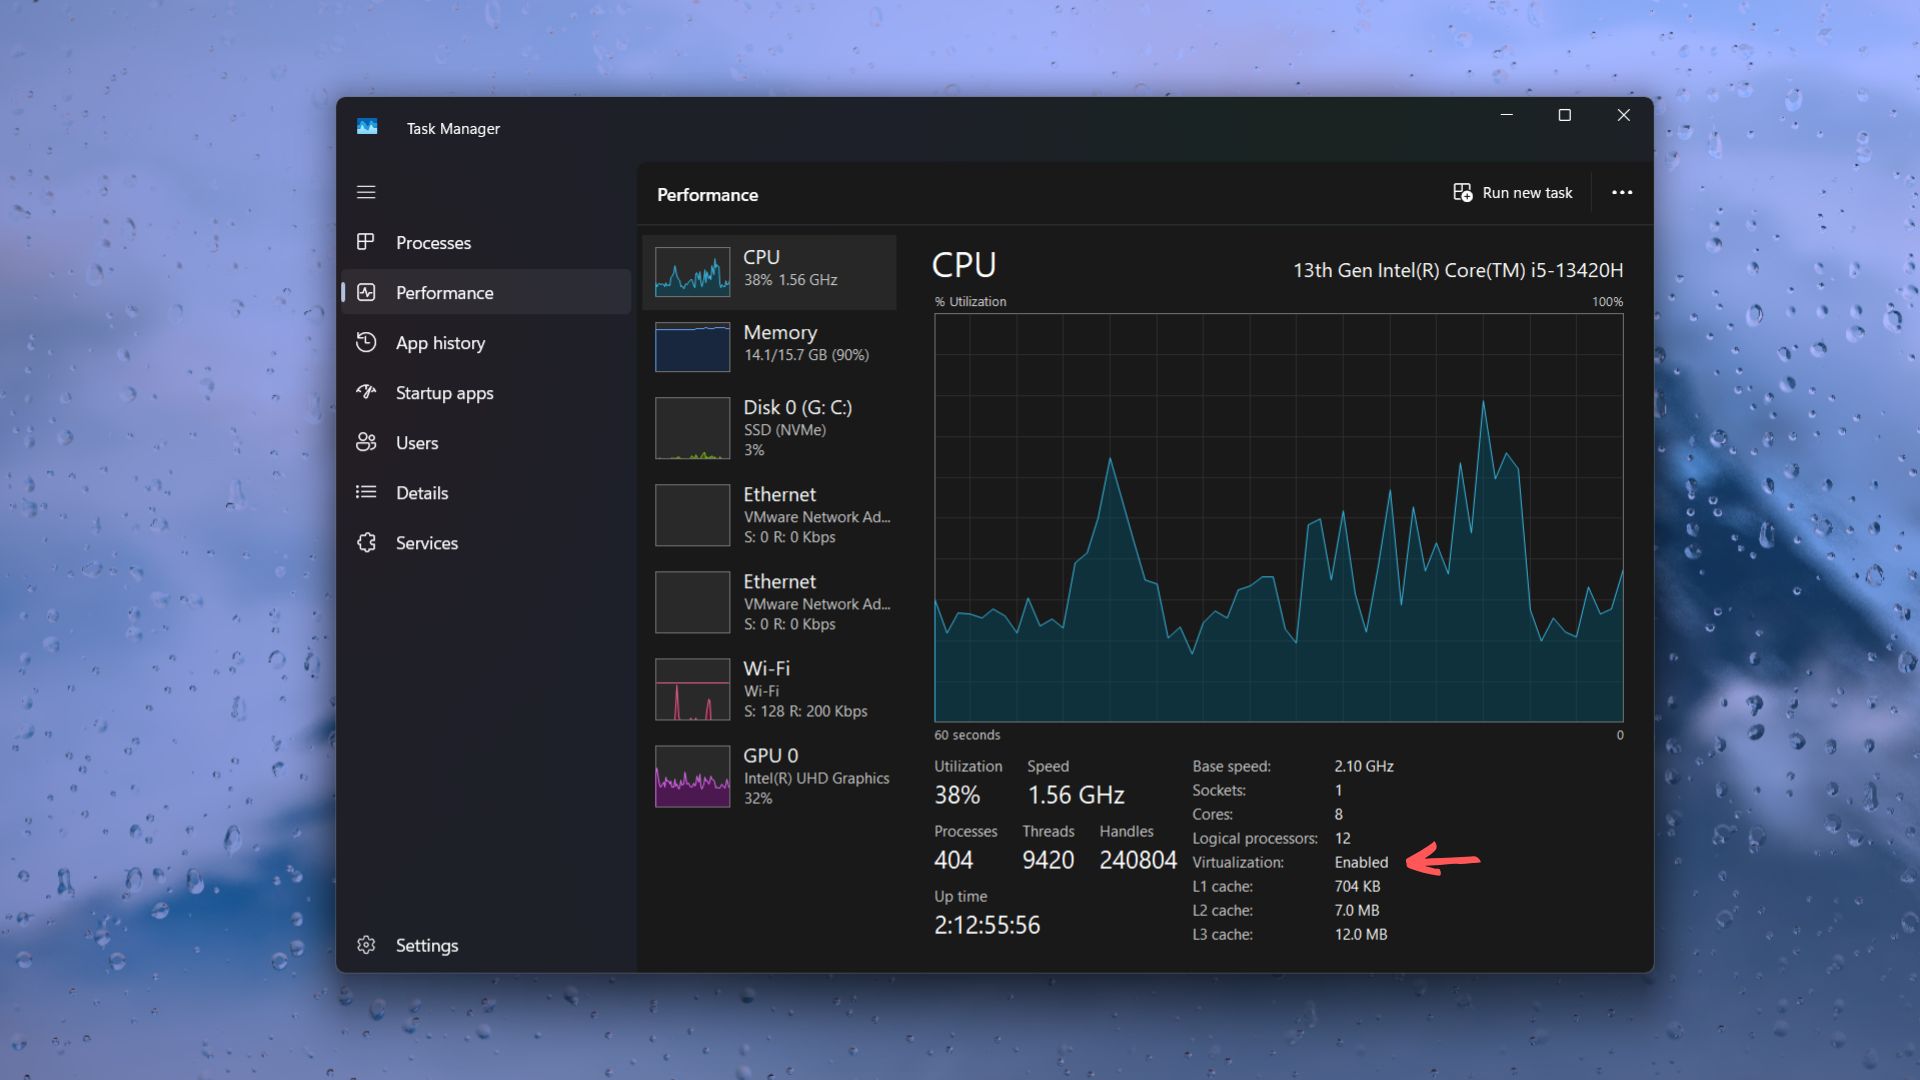
- To check if it’s already turned on, press Ctrl + Shift + Esc to open Task Manager.
- Go to the Performance tab, and select CPU.
- Check if Virtualization: “Enabled” or “Disabled” at the bottom right.
Chances are that it will be Enabled by default, but if it’s Disabled, proceed to BIOS setup.
- For that, restart your PC, and while it boots up, press the Esc key repeatedly.
- In the BIOS menu, go to Advanced, CPU Configuration, or Security tab.
- Look for either Intel VT-x or AMD-V. Set it to Enabled.
- Follow the on-screen instructions to Save Changes and Exit BIOS.
With virtualization enabled, your PC is ready for Sandbox, and subsequently Microsoft Store in Sandbox.
But if you’re using a virtual machine (such as VMware), you need to enable nested virtualization.
The PowerShell script that installs Store doesn’t require external dependencies, but it fetches the Store installation files from Microsoft’s servers, so you’ll need an active internet connection in the Sandbox session.
Note that the script can technically run outside Sandbox too, and if done so, it will try to install the Microsoft Store on your main system. So, make sure you’re inside the Windows Sandbox environment before running the script.
How to enable Sandbox in Windows 11
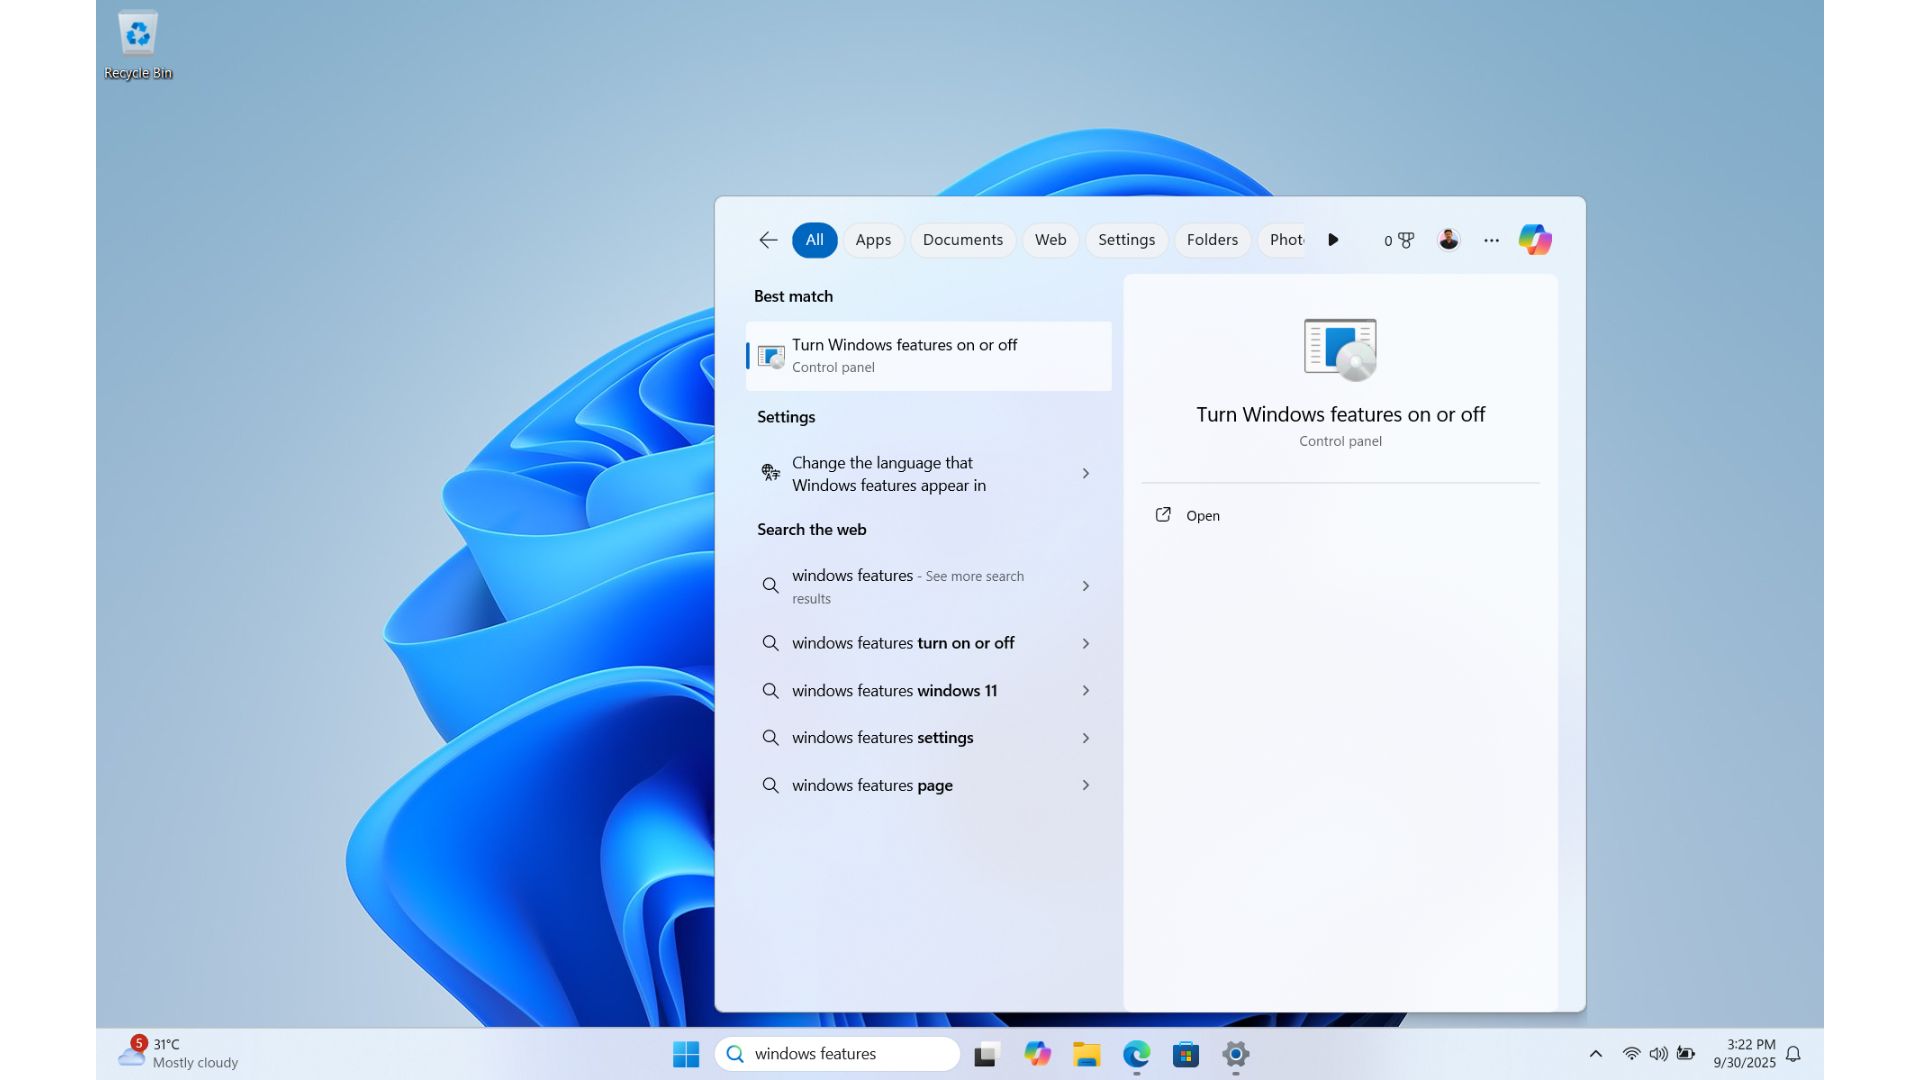
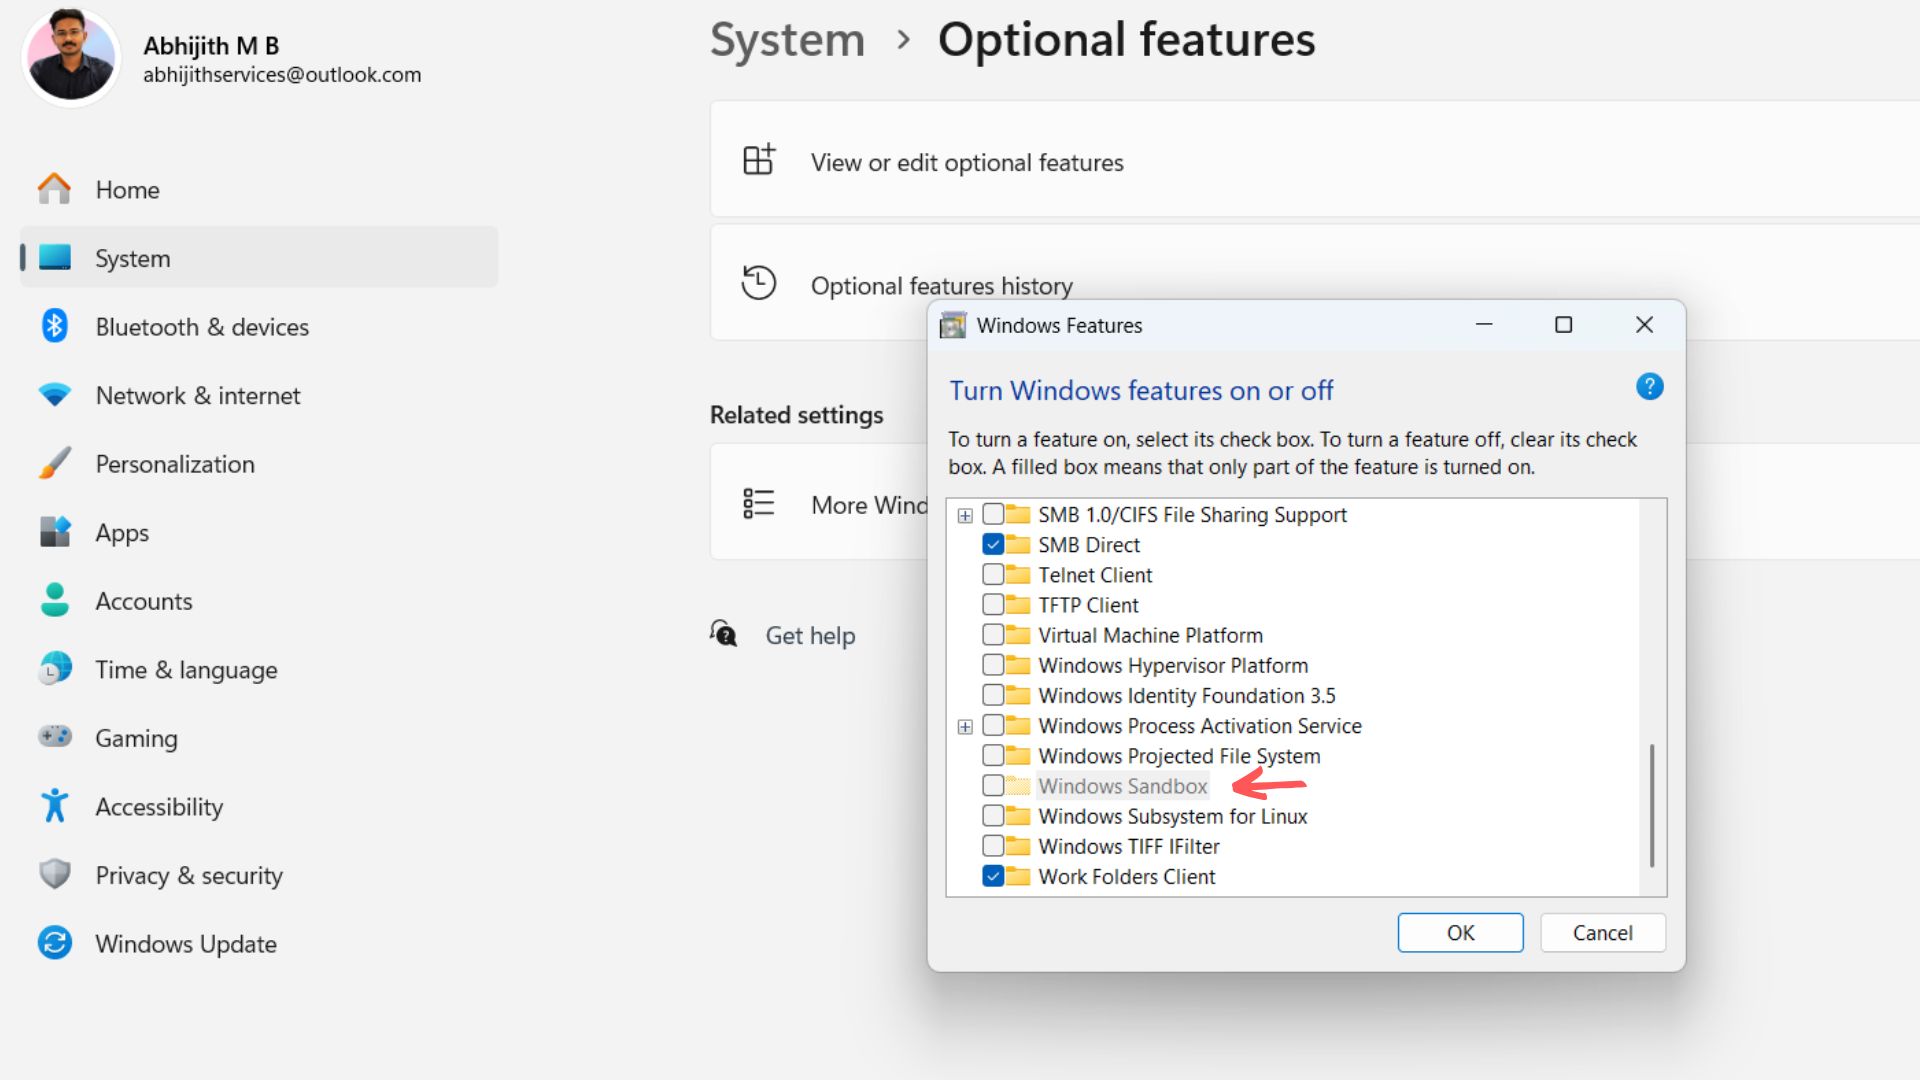
- Press Windows key + S to open Search and type “Windows features”, you’ll see the option “Turn Windows features on or off”. Click on it.
- A legacy window will pop up. Scroll down and tick the checkbox for Windows Sandbox.
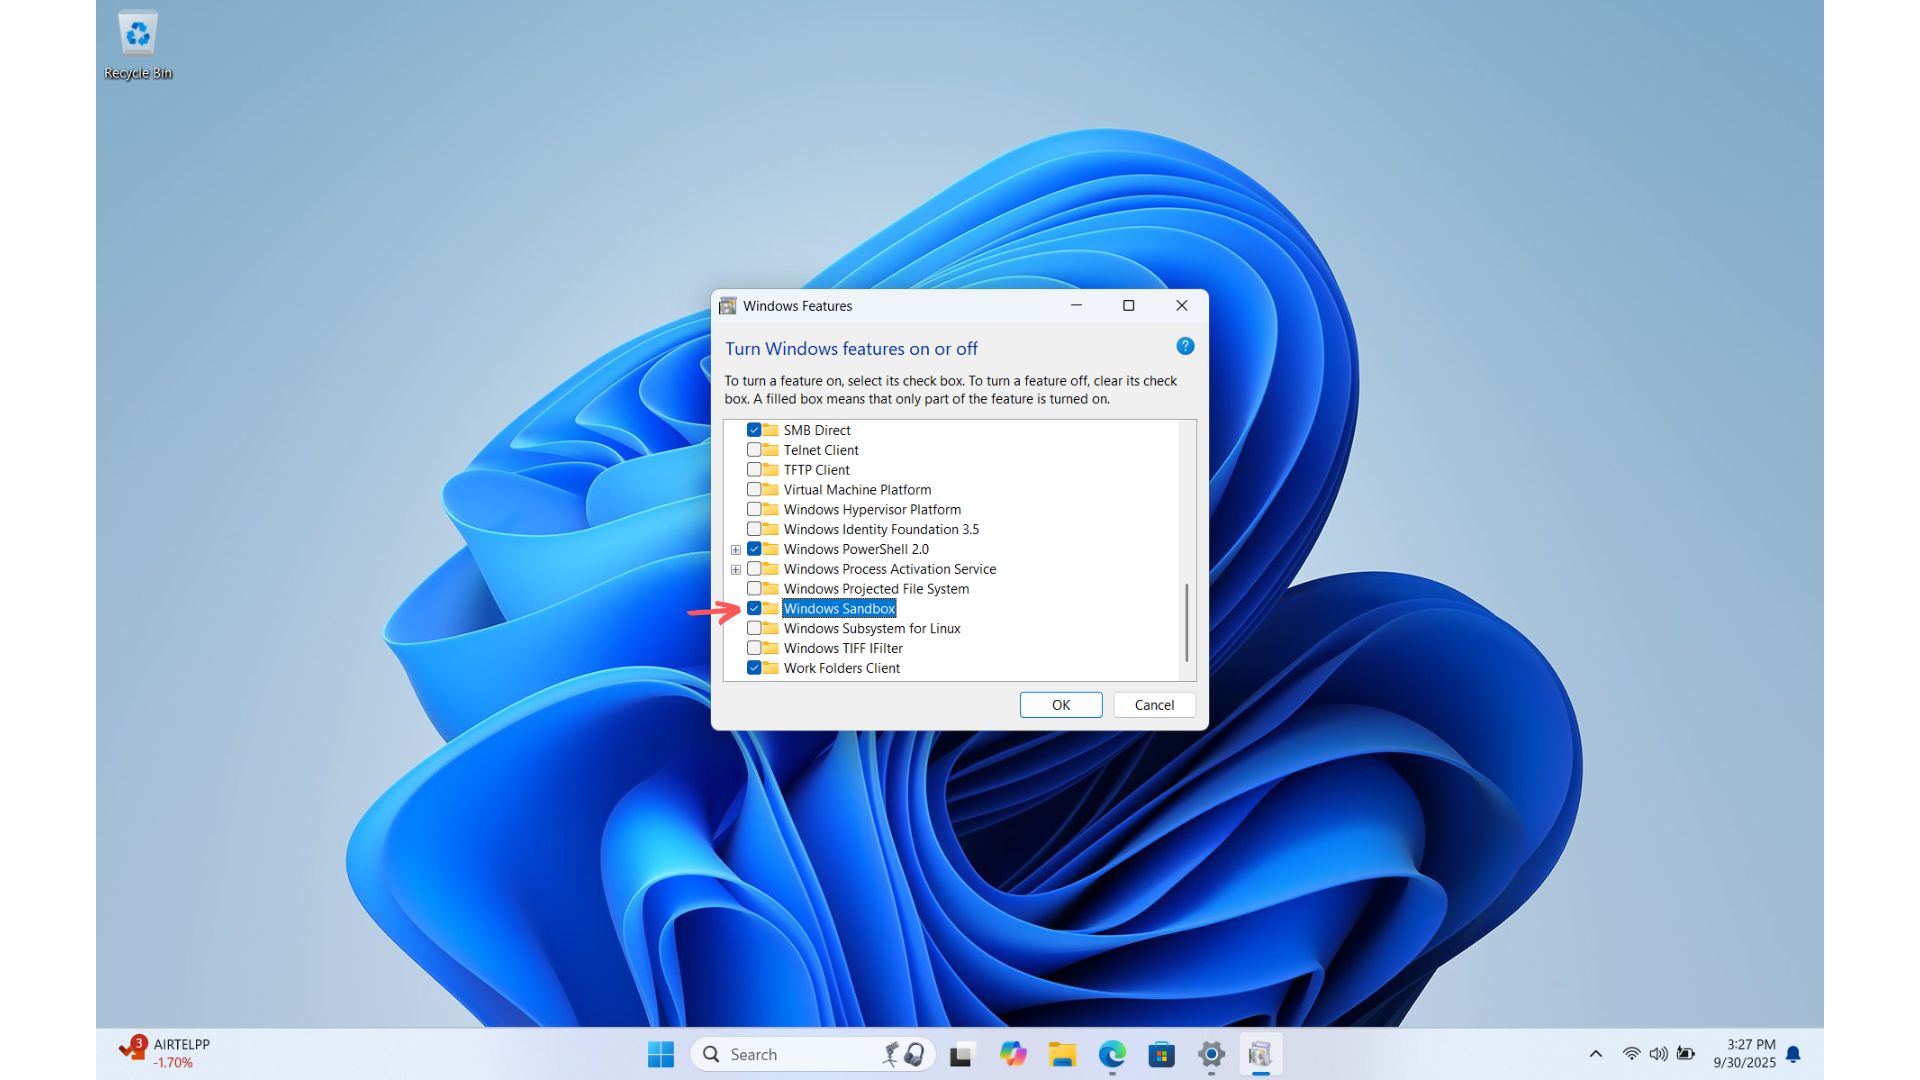
- Click OK. Windows will now install the feature.
- Restart your PC.
- After reboot, press the Windows key and search for Windows Sandbox to see if it installed successfully.
How to install Windows Sandbox in VMware when it’s grayed out?
If you use VMware to run Windows 11 Pro in a virtual machine, you’ll see that the legacy window will show Sandbox faded out.
For it to become available, you’ll need to first enable nested virtualization:
- Make sure your Windows 11 Pro host PC already has virtualization enabled.
- Shut down your Windows 11 VM.
- In the VMware Workstation, right-click your VM and select Settings.
- Under the Processors tab, you have to check the box Virtualize Intel VT-x/EPT or AMD-V/RVI. Now, nested virtualization is enabled inside the VM.
- To install Sandbox in your VM, boot up the VM, then open “Turn Windows features on or off” and tick the Windows Sandbox checkbox.
- Restart your VM.
Remember that if your VM is already pretty laggy, Sandbox, even with its lightweight build, might be more resource-heavy. Make sure you have enough RAM and CPU cores allotted to handle this extra weight.
With Sandbox up and running, you can install Microsoft Store in it using the PowerShell script available on Github.
What the script actually does
We dug through the whole script, and fortunately, it’s quite straightforward. While it looks intimidating, in reality, at a higher level, it’s doing a very systematic set of steps:
- The script first verifies if it’s being run inside Windows Sandbox by checking the username (WDAGUtilityAccount). If not, it warns you.
- The script sends a “GetCookie” request to authenticate using Microsoft’s official Windows Update web services. This is what tells Microsoft’s servers that you’re allowed to download official app packages.
- With that cookie, the script sends another request (SyncUpdates) asking specifically for packages linked to the Microsoft Store’s category ID. This returns a list of files, including the app package and its dependencies.
- It then fetches the direct download URLs for each file, such as the Store app itself along with dependencies.
- All these files are saved into your Sandbox Downloads folder inside a subfolder.
- Dependencies are installed first using PowerShell’s Add-AppxPackage command.
- Finally, the main Microsoft.WindowsStore package is installed. Store will not launch unless its supporting frameworks are already up and running.
- At the end, the script sets the Sandbox region to US in the registry, because the Store won’t work properly in Sandbox’s default “World” region.
Installing the Microsoft Store in Windows Sandbox using a PowerShell script
The script to install Store in Sandbox is publicly available on GitHub. You don’t have to clone the repository or use any GitHub commands.
Here’s what I did:
- Open this GitHub link in your host’s browser.
- Copy the entire PowerShell code directly from the page. There is a button at the top right of the code block that says “Copy raw file”. Click it or just manually select the text and copy it.
- Open Windows Sandbox on your PC.
- Inside Sandbox, open Notepad.
- Paste the copied text into Notepad.
- Save the file with a .ps1 extension (for example, Install-Store.ps1). When saving, select Save as type: All Files. It should not be just .txt.
I saved mine on the Desktop inside Sandbox, so it was easy to find.
Running the Microsoft Store script in Windows Sandbox
After saving the .ps1 file, here’s how I installed Microsoft Store (Remember the following steps are done inside the Sandbox and not on your host PC):
- Right-click the Start button in Sandbox and open Windows Terminal (Admin) or PowerShell (Admin). If you saved it on the Desktop, type: cd $env:USERPROFILE\Desktop
- Chances are that PowerShell may block scripts for security reasons, so to allow it temporarily, run this command: Set-ExecutionPolicy -ExecutionPolicy Unrestricted -Scope Process
- This change is perfectly safe as everything resets after you close the present Sandbox session.
- To run the script, type the following command (change it according to the name you gave):
.\Install-Store.ps1 - You will see the script fetching files directly from Microsoft’s servers. You’ll see it downloading packages such as Microsoft.UI.Xaml, .NET Framework dependencies, and finally Microsoft.WindowsStore.
- The script will automatically install the Microsoft Store app.
Now, press the Start menu in Sandbox and look for the Store. Wait for it to load and see if you can install any app like you would normally do in your host PC.
Once you close Sandbox, the Store will be deleted. So you need to re-run the script every time you want the Store in Sandbox.
Despite having an amazing test environment for Windows, and despite Microsoft Store getting more traction, the software giant is still not seen promoting Sandbox, or giving native support for the Store in Sandbox.
Our guess is that the feature is designed for enterprise users who would want to check new software frequently. The biggest letdown is that Sandbox isn’t supported in Windows Home versions, even though it is shipped by default in most OEM Windows laptops.


")

")
")

 and it removes old modem drivers")
