
")


")


When Microsoft released Windows 11 22H2 in the Release Preview Channel, there was a lot to get excited about. The update brought back support for missing features like the drag and drop to the taskbar and added a couple of new options to the Start.
The company has continued to make further improvements to the OS, and the last cumulative update release saw not only bug fixes and general enhancements, but also support for tabs in File Explorer. In addition to things such as the ability to add stickers to the desktop, Windows 11 22H2 also includes a new tabbed File Explorer.
So, what exactly can you do with tabs in File Explorer, and how do you enable the feature on Windows 11 22H2? For those unaware, a File Explorer with tabs is similar to a web browser. With tabs, you can browse multiple directories without having to open a new instance of the app.
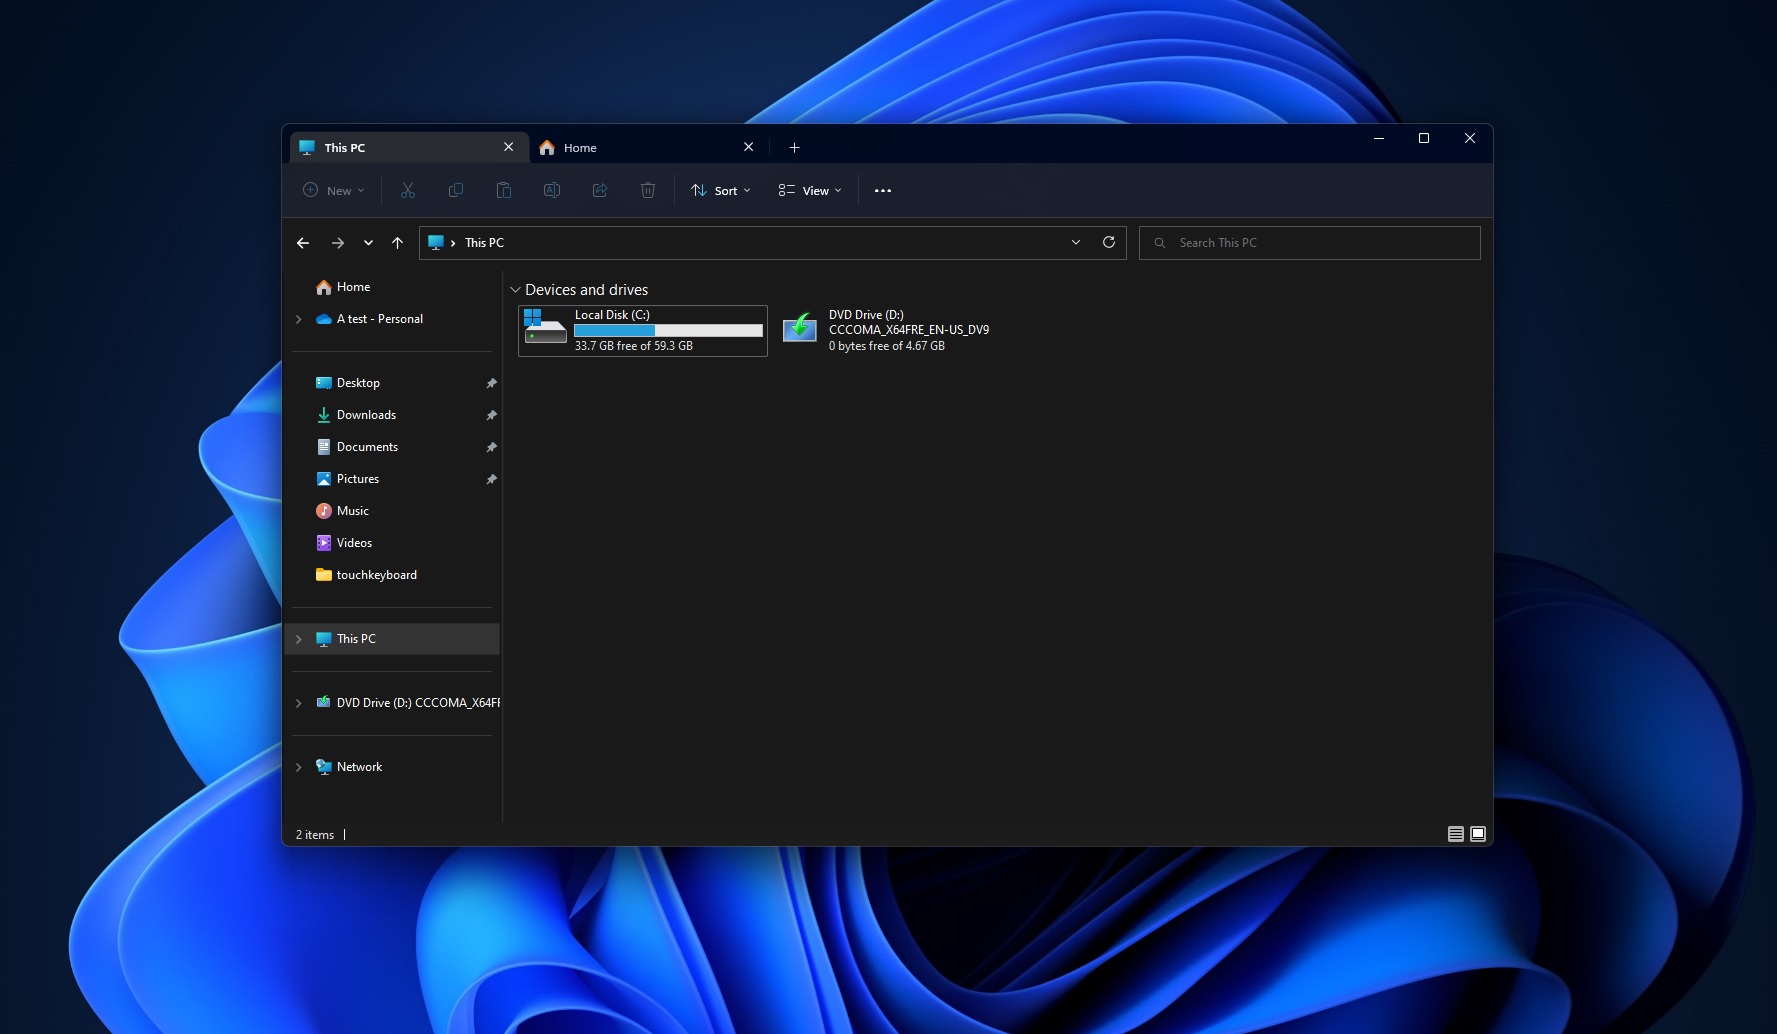
Tabs interface makes Windows 11’s File Explorer even more useful. Considering that tabs serve as a new multitasking tool for Windows 11, you might well find that it can save you time. This useful feature was previously available for select users only as the support for File Explorer tabs has been exclusive to insiders in the Dev channel.
How to enable File Explorer tabs on Windows 11 22H2
Windows 11 Build 22621.160 (22H2) or newer includes tabs in File Explorer, but the functionality is apparently hidden. This update is available right now for everyone in Beta Channel and it will be rolling out to the Release Preview Channel soon.
As long as your device is configured to receive builds from the Beta Channel (22H2) or you have Build 22621.160+, you can also try the new navigation pane alongside tabs in File Explorer.
To enable tabs in File Explorer, follow these steps:
- Join Windows Insider Program and sign up for Beta Channel.
- Reboot your device to finish installing Windows 11 Build 22621.
- Open Github and head to the downloads page of a tool called ‘ViveTool‘.
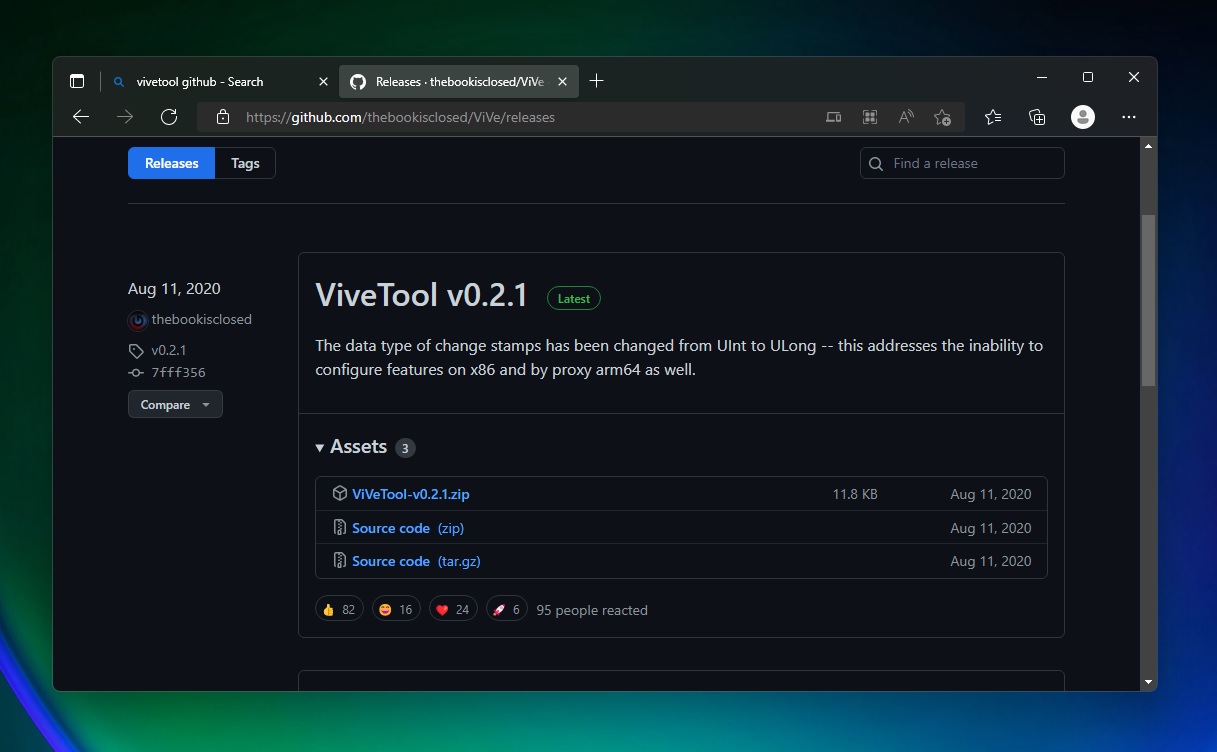
- Save ViVeTool-v0.2.1.zip to an easily locatable folder.
- Right-click on the .zip file and extract everything inside the folder you just created.
- Navigate to the folder where you extracted the tool and copy its path.
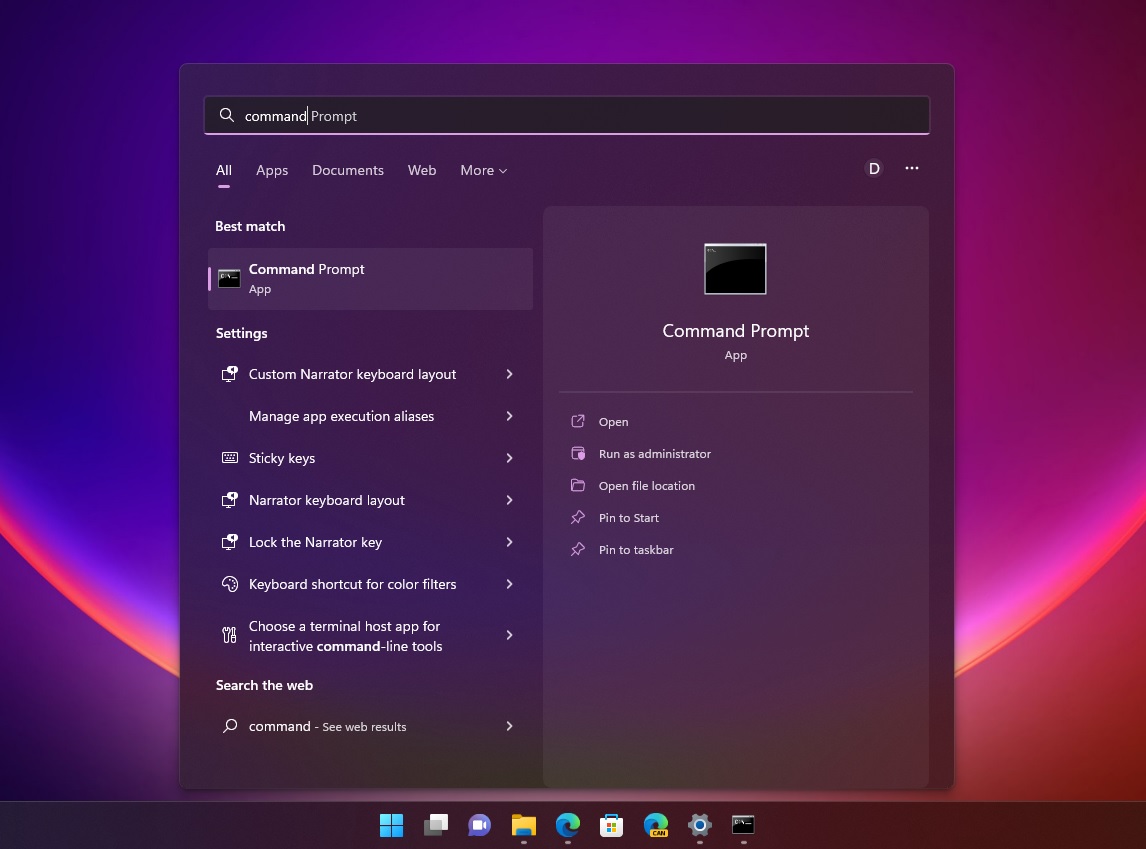
- Open Windows Search.
- Type Command Prompt and run it as ‘administrator‘.
- Type cd <paste the path you copied in step 6>. Example: cd C:\Users\mayank\Downloads\ViVeTool-v0.2.1
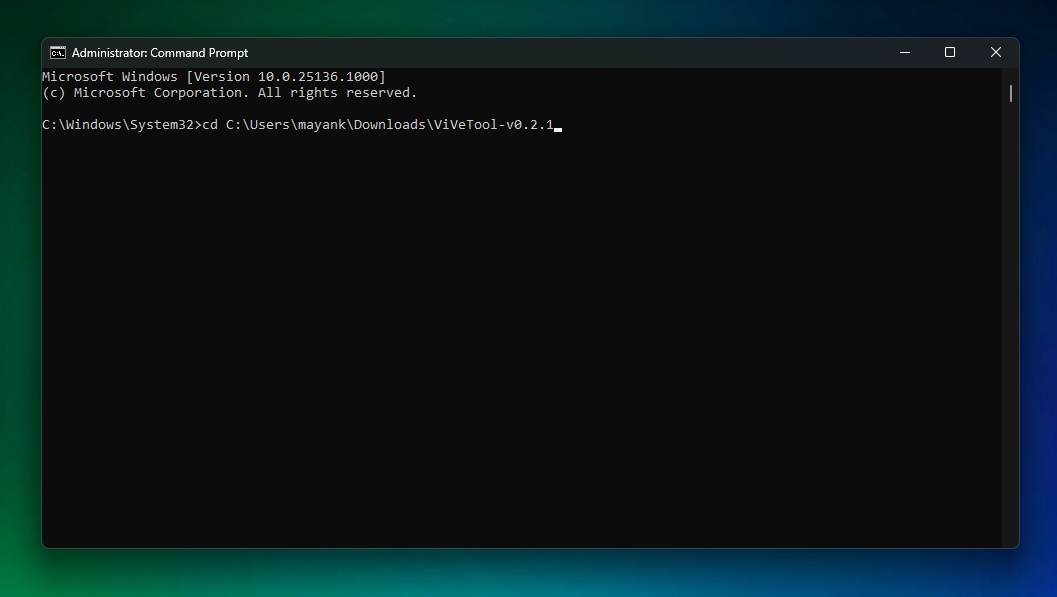
- If you followed the steps correctly, Command Prompt’s directory will change to the path where you extracted ViVeTool-v0.2.1.zip.
- In the same Command Prompt, enter the following commands one by one and reboot the system.
vivetool addconfig 39145991 2
vivetool addconfig 37634385 2
vivetool addconfig 36354489 2
Open File Explorer and you will notice two major changes – tabs are enabled by default and there’s a new sidebar that promises a better navigation experience.
However, remember that File Explorer’s tab layout is still under development and Microsoft is aware of several issues. For example, a bug causes the up arrow to be misaligned in File Explorer tabs. The company plans to resolve it in a future update for Windows 11 version 22H2 or newer.
There’s another bug where File Explore’s body could render in light mode even when the OS itself is set to light mode.


")


")
